Insulation Techniques for e-Textiles
Introduction
This tutorial introduces five different methods for insulating conductive thread traces in an e-textile project. All the materials used in these methods can be found at your local craft or hobby store and require no specialized tools.
Why Insulate?
Conductive thread acts like uninsulated wire, which makes it great for sewing components together, but once a project is finished, the movement of fabric can let some pieces of thread accidentally touch. When working with conductive thread, make sure to pay special attention to insulating any power and ground lines so that they don’t short out your battery. Insulating stitches, once a project is complete, adds protection from potential short circuits created by movement, folding, or contact with conductive surfaces, as well as adding an extra barrier during wear and tear or washing.
Suggested Reading
Before You Begin
Make sure your project is fully functioning and completed before doing any insulation techniques – most of these are permanent methods of covering your stitching, and it will be very difficult to do any adjusting after the paint/glue dries.
Project Prep
Use this checklist to make sure your project is ready to be insulated:
- All knots are secured and tails are clipped short
- No short circuits or crossing threads
- Battery/Power is removed or turned off - never work on a project while it is powered!
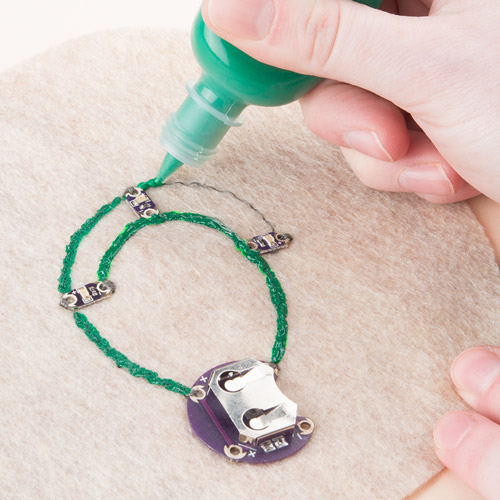
Stretch Fabric Glue
Using stretchy fabric glue is a great way to cover conductive thread without interfering too much with the flex of the fabric it is sewn into. This type of glue is typically used to fuse two pieces of fabric together, but can also provide a nice protective layer if applied on top of fabric.
This technique is one we learned from How To Get What You Want - a website full of tools and techniques around e-textiles and e-crafts.
Difficulty: Intermediate
Drying/Setting Time: Overnight
Mess Level: Moderate
Materials Needed:
- Stretch fabric glue
- Scrap paper
- Paintbrush (optional) - to help spread the glue
- Masking tape (optional) - use as a stencil for clean edges
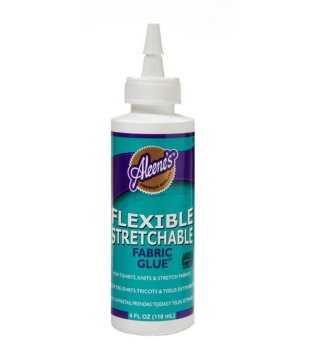
Aleene’s Flexible Stretchable Fabric Glue is a common brand name and one we use a lot here in our e-textiles projects.
Instructions:
Apply a thin layer of glue over conductive thread directly from the squeeze bottle or using a paintbrush. Less is more with this technique - big globs of glue take longer to dry. Painting a few thin layers will give you better results than one thick layer.
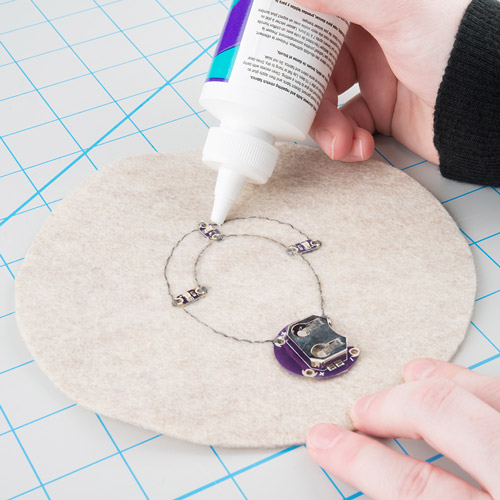
* For extra neat lines try using masking tape around the sides of the thread to make a stencil, peel off when glue is completely dry.
Set aside to dry overnight. This glue is notoriously slow drying, so the longer you can let it set, the better. Depending on the thickness of the layer, it may remain tacky even after drying - a quick dusting or rub down of flour or baby powder will help.
Pros:
- Flexible, stretchy seal over fabric and thread
- Dries clear
Cons:
- Takes practice to make even lines over thread
- Long dry time
- Glue remains shiny - flour/baby powder will also help with shine
Examples:
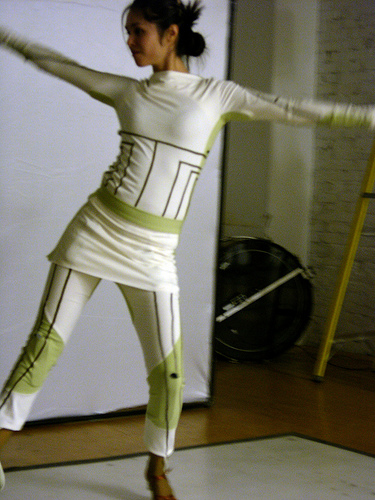
Check out Mika Satomi and Hannah Perner-Wilson’s Language Game project for a costume that uses this technique over conductive fabric traces. Learn more about using conductive fabric instead of thread in your project here.
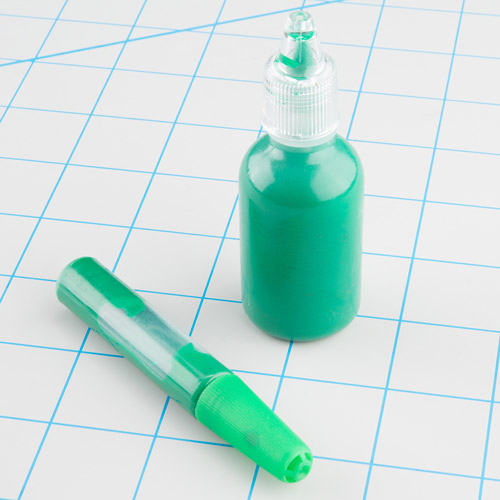
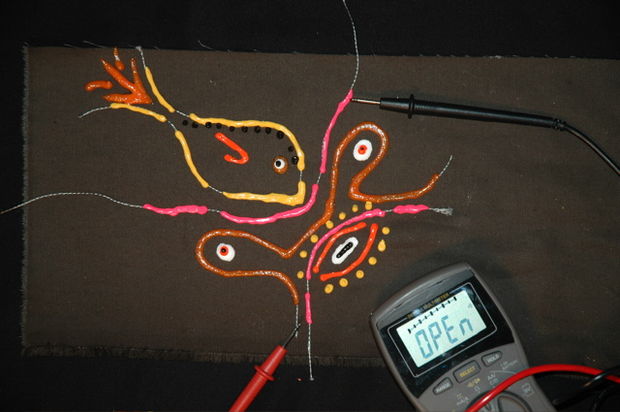
Fabric Paint
Fabric paint is a quick way to add insulation and style to a project. Using different colored paints to hide and decorate stitches can create a really unique look for the front of your project. We recommend using 3D or ‘Puff Paint’ because its thickness makes covering traces a lot quicker and the tubes have a fine tip that makes applying much easier than a paintbrush.
Difficulty: Easy/Intermediate
Drying/Setting Time: Overnight
Mess Level: Moderate
Materials Needed:
- Fabric paint - 3D/Dimensional/Puff paint works great because it is commonly packaged in a squeeze tube or pen
- Scrap paper
- Paintbrush (optional) - to help spread the paint
- Masking tape (optional) - use as a stencil for clean edges
Common Dimensional Paint Brands: Tulip Dimensional Paint, Scribbles Dimensional Fabric Paint, Puffy Paint. Look for these in the apparel crafting or paint section of your local craft store.
Instructions:
Have some scrap paper ready and do a few practice lines to get a feel for the flow of the paint. Make sure to shake the paint in case there was any separation of the pigment. When you are ready, carefully paint over the conductive thread, making sure to use a thin layer. You can always add a second layer if needed - avoid large clumps of paint as these tend to smear easy and take a long time to dry.
When your painting is complete, let sit overnight to dry.
Pros:
- Decorative seal over thread
- Lots of colors
Cons:
- Takes practice to make even lines over thread
- Long dry time - especially with thick paint
- Squeeze tubes have a tendency to squirt out in large clumps - always have scrap paper handy when you first start using a tube
Examples:
Lynne Bruning wrote a quick tutorial on this technique that shows an interesting design with paint.
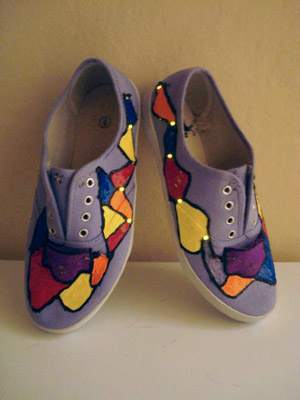
This LED Shoes Tutorial by Instructables member Carleyy makes great use of paint to hide the stitches and create a cool design.
Fabric Layer/Liner
Using a layer of fabric (or building your circuit underneath a garment’s lining) is an easy way to protect conductive thread and leave a soft backing if the project is going to be worn against skin. This is also good method for insulating the front of your circuit with fabric designs.
Difficulty: Easy
Drying/Setting Time: None
Mess Level: Minimal
Materials Needed:
- Fabric
- Scissors
- Needle and non-conductive thread OR glue (fabric glue or hot glue gun)
Instructions:
Cut a piece of fabric (or small pieces) to cover your circuit. Attach the fabric by sewing or using glue, being careful not to accidentally damage any of your stitches or components. Get creative with your designs if insulating the front of your project - appliqué, cut outs, and shapes can add interest as well as insulation.

Tips:
- If using glue, be careful it doesn’t saturate through the top of the fabric.
- When cover a large area, make sure to sew or glue at various places in the middle of the fabric, not just at the edges. This helps keep the fabric flush with the circuit and avoids any accidental folding underneath that could short circuit the thread.
Pros:
- No exposed wet paint or glue to deal with
- Great way to use scrap fabric from constructing your project
Cons:
- Can get bulky depending on fabric choice
- Sewing can be time intensive, depending on the complexity of your designs
Examples:

Our Twinkling Trick or Treat Bag project uses fabric designs to cover up components on the front of the bags.
Embroidery/Decorative Stitching
If you have a lot of patience (or a sewing machine), using embroidery to cover conductive thread traces can add a beautiful finishing touch to your project. Depending on your project size and fabric type, hand embroidery may be easier to do than fitting the project on a machine. This method also works well if you are insulating the front of a project. For just the interior, try a quicker method like interfacing or fabric layers.
Difficulty: Intermediate
Drying/Setting Time: None
Mess Level: Minimal
Materials Needed:
- Embroidery Thread
- Embroidery Needle
- Scissors
- Sewing Machine (optional)
Instructions:
Hand Stitching:
Carefully follow the line of conductive thread and cover using a satin stitch. Here’s a tutorial from Sublime Stitching on the satin stitch. You can also add additional embroidery around the conductive thread to incorporate it into a larger design. Get creative!
Machine Stitching:
If you project fits easily on a sewing machine, use a zig zag (or button hole) stitch on a small setting and sew over the conductive thread. Be careful not to sew over any components - they could get damaged by the needle, or more likely break your needle and get caught in the machine. Leave about an inch around any components and a long tail of thread to finish the stitching by hand.
Lynne Bruning published a tutorial on this technique that walks you through loading your project into a machine.
Tips:
- Make sure the embroidery stitches are close together and completely cover the conductive thread - any gaps will expose the thread and leave more room for short circuits.
Pros:
- No wet paint or glue to deal with
- Creative stitching will completely camouflage your traces
- Can insulate both front and back of stitching in one step
Cons:
- Embroidery can be tedious work for beginners
- Time intensive
Examples:
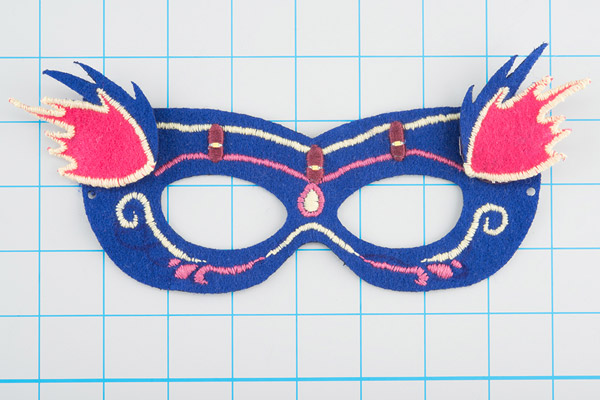
This embellished version of our E-Textile Mask project uses embroidery to add detail and cover up the conductive thread and LEDs.
Fusible Interfacing
Fusible interfacing is typically used to add some structure or strength to parts of garments such as necklines or buttonholes. We’ll be using interfacing to cover conductive thread traces in wearables projects.
Difficulty: Easy
Drying/Setting Time: None
Mess Level: Minimal
Materials Needed
- Fusible Interfacing
- Iron, Ironing Board
- Parchment Paper (optional, to protect the iron from any adhesive ironed by mistake)
- Scissors
- Marker
Choosing Interfacing
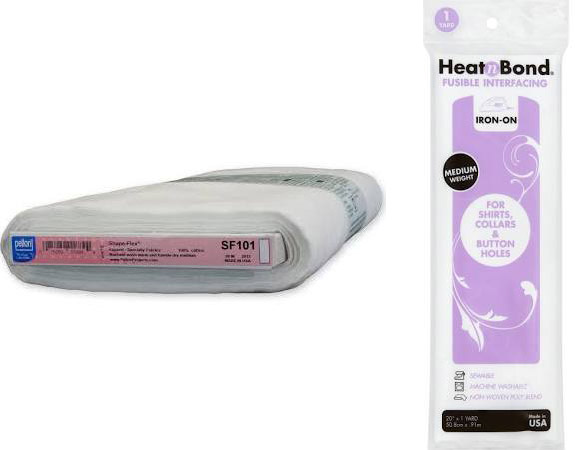
Interfacing comes in many types, from iron-on to sewable, heavy duty to light weight. It can be found at most craft and hobby stores like JoAnn Fabrics, Michaels, Hobby Lobby, or fabric stores.
Most fusible interfacings will have adhesive on one side. The adhesive (bumpy side with small glue droplets) presses against the fabric and melts to it when ironed, leaving a soft backing on the lining of your fabric.
When you go to the store look for a fusible or iron-on web or interfacing - make sure that it is one-sided adhesive. Some stores sell a double sided iron-on product made for fusing two pieces of fabric together, we won’t need that. Some common brands are Heat'n Bond (sold in a package) and Pellon (sold on a bolt as cut by the yard).
Preparing Your Circuit
Place some interfacing (adhesive side down) over the back of your project.
Draw on the interfacing to mark out small pieces to cover the conductive thread. Be careful to leave some room around any components so the interfacing doesn’t cover them. The heat from the iron could be damaging to LilyPad pieces. Use a piece of parchment paper between the project and your iron to protect from any adhesive accidentally transferring to the iron.
Pros:
- No wet paint or glue to deal with
- Quickest method of insulation
Cons:
- Some fabrics don’t respond well to heat and could melt when using the iron setting needed to activate the adhesive - always check your fabric or do a test on a scrap piece before ironing.
- This method isn’t great for tiny projects, or ones with components very close
Examples:
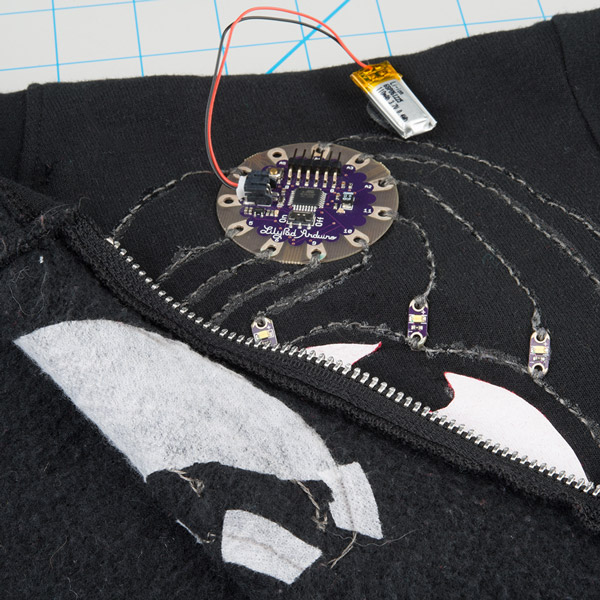
This LilyPad powered light up sweatshirt uses interfacing to protect the stitching and for the wearer’s comfort.