LilyPad Basics: E-Sewing
What Are Sewable Electronics?
Sewable electronics combine traditional craft processes (sewing, fashion design, and textile design) with electrical engineering, computer science, and hardware skills.
With sewable electronics, you can create e-textiles (electronic textiles), which are often wearable, flexible projects that look less like traditional electronics and more like craft and art projects. Many e-textile projects replace wiring with flexible conductive materials such as conductive thread and fabric. For the projects in this guide, we will be sewing circuits together with conductive thread.
Suggested Reading
If you are new to circuits as a concept, you may want to have a look at some of the tutorials below before continuing.
What is a Circuit?
Every electrical project starts with a circuit. Don't know what a circuit is? We're here to help.
Voltage, Current, Resistance, and Ohm's Law
Learn about Ohm's Law, one of the most fundamental equations in all electrical engineering.
What is Electricity?
We can see electricity in action on our computers, lighting our houses, as lightning strikes in thunderstorms, but what is it? This is not an easy question, but this tutorial will shed some light on it!
What Is LilyPad?
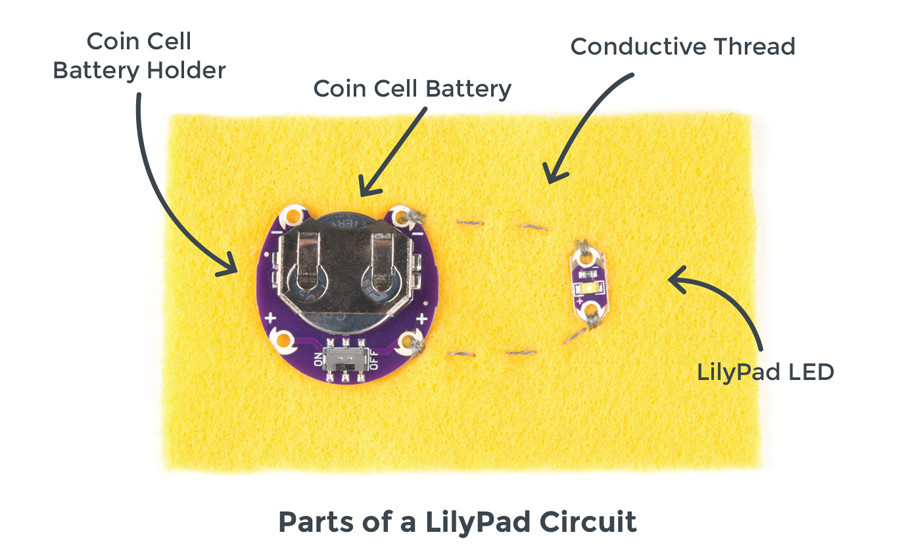
The LilyPad system is a set of sewable electronic pieces designed to help you build soft, sewable, interactive e-textile projects. Using LilyPad pieces is a great way to experiment with electronics through the lens of crafting. Each LilyPad piece has large conductive sew tabs for easy sewing and a rounded shape so as not to snag fabric or cut thread.
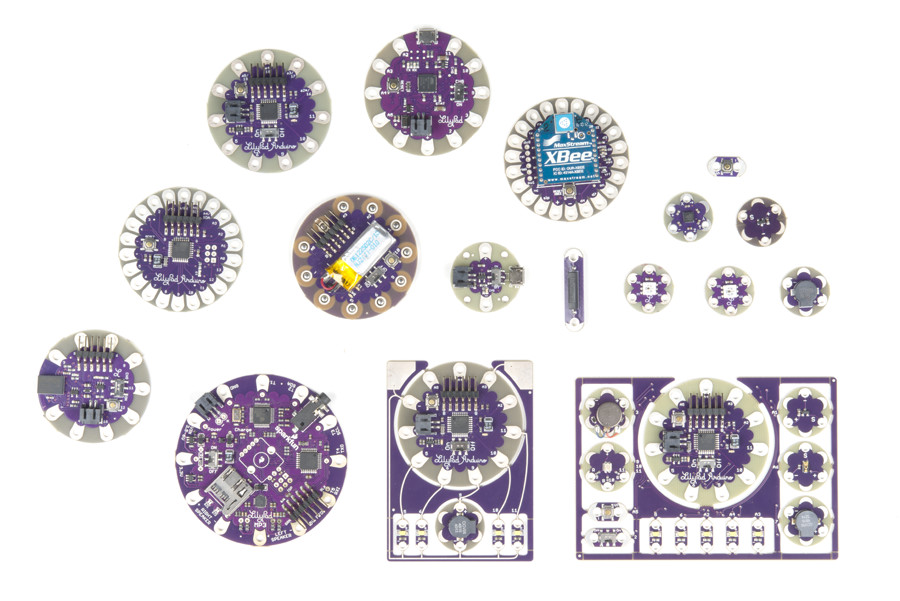
The LilyPad system was designed by Leah Buechley while pursuing her Ph.D. in computer science at the University of Colorado Boulder. The commercial version of the kit, which launched in 2007, was collaboratively designed by Leah and SparkFun Electronics. You can learn more about LilyPad at SparkFun.com/LilyPad.

LilyPad Creator Leah Buechley
To browse LilyPad products visit the LilyPad section of the SparkFun.com catalog
 |
ProtoSnap Components |
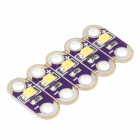
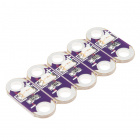
Some LilyPad pieces come in a ProtoSnap configuration, which means all of the individual components – such as LEDs, battery holder, switches, buttons, etc. – are attached to one another in a single functioning circuit board. This allows you to easily program your circuit to do what you want before embedding it in your project. ProtoSnap boards are designed to be easily snapped apart into individual pieces when you’re ready to begin creating LilyPad projects.
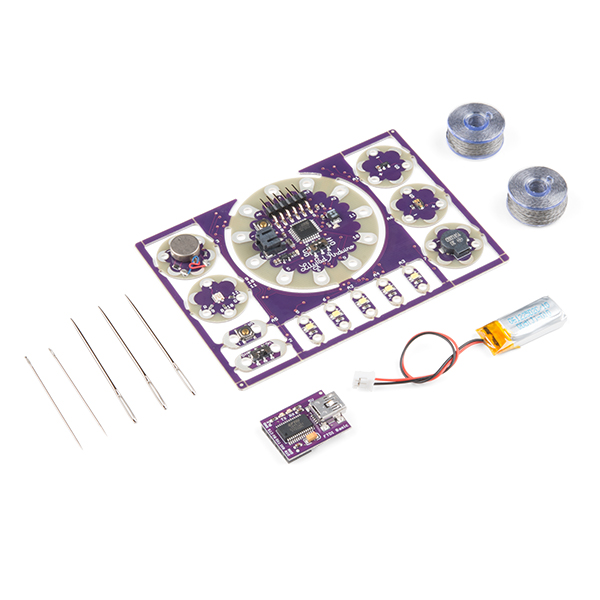
This is slightly different than LilyPad products that come in a panel configuration. The LilyPad LEDs are attached together, but not in a functional circuit. You will need to snap them apart before sewing into a circuit.

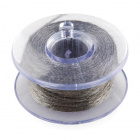
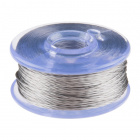
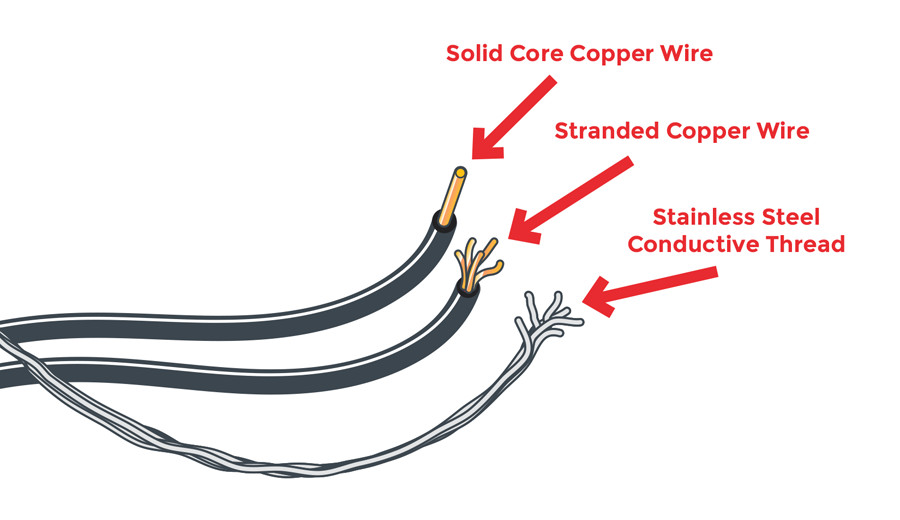
What Is Conductive Thread?
Conductive Thread is a specialty thread made with stainless steel fibers. It can be used instead of copper wiring to connect LilyPad (or other e-textile) pieces together to create circuits.
If you are using a LilyPad kit such as the LilyPad Sewable Electronics Kit, you will have a conductive thread bobbin available to use.
SparkFun carries a few conductive thread options:
Sewing with Conductive Thread
Most LilyPad projects use conductive thread to complete electrical circuits. The following sections will introduce you to some basic sewing techniques as well as a few special pointers for using conductive thread to build working circuits. Even if you’re already familiar with using a needle and thread, this section may still be useful to you, specifically where it pertains to sewing with LilyPad parts.
 |
Securing Your Components |
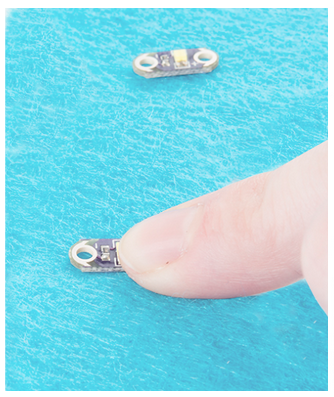
Each LilyPad piece has large holes with conductive silver pads called sew tabs. These tabs are designed to give you plenty of room to pass a needle and thread through the hole several times. Before you begin stitching your circuit, identify the sew tabs you would like to connect, and orient them so they are easily accessible in your design. If following along with SparkFun templates, the pieces will have a specific location on the design for both ease of sewing and visual appeal.

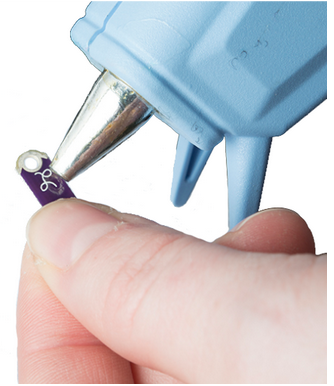
We recommend using a small dot of hot glue (preferred) or fabric glue to attach each LilyPad piece to the fabric to keep it from moving while you sew. Make sure not to accidentally seal up the holes in the sew tabs.
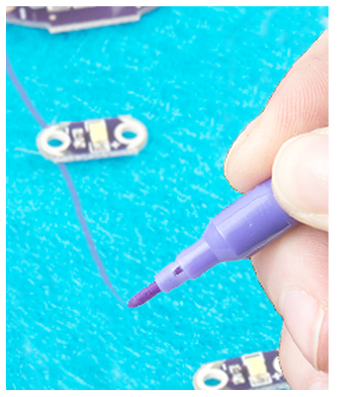
To help plan where the stitches will go, you can use a marker to draw lines between the components.
 |
Threading a Needle |
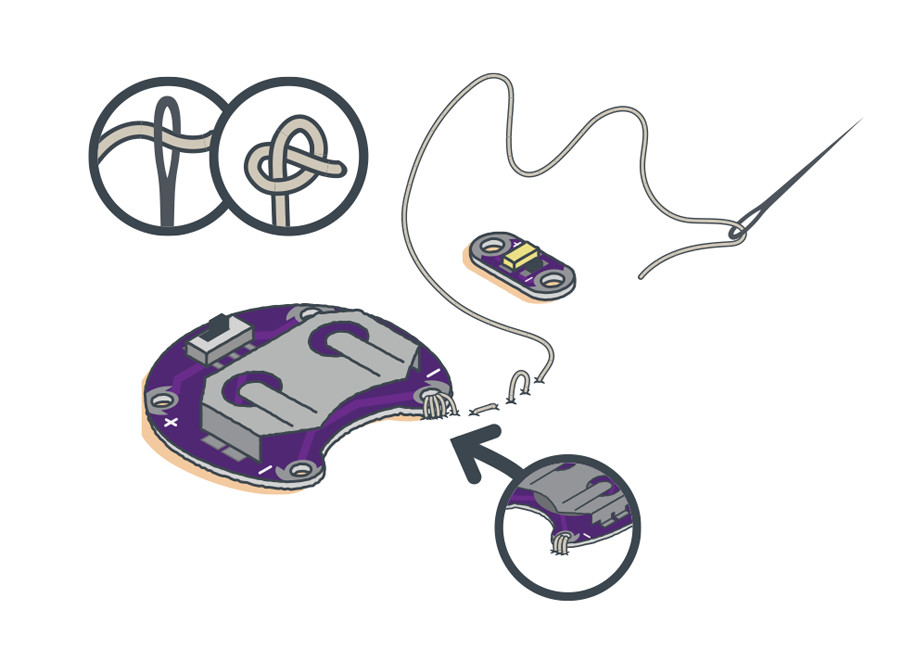
Cut a piece of conductive thread approximately 2 feet long. Push one end of the thread through the eye (opening) of the needle and pull through, leaving a tail of about 5 inches.
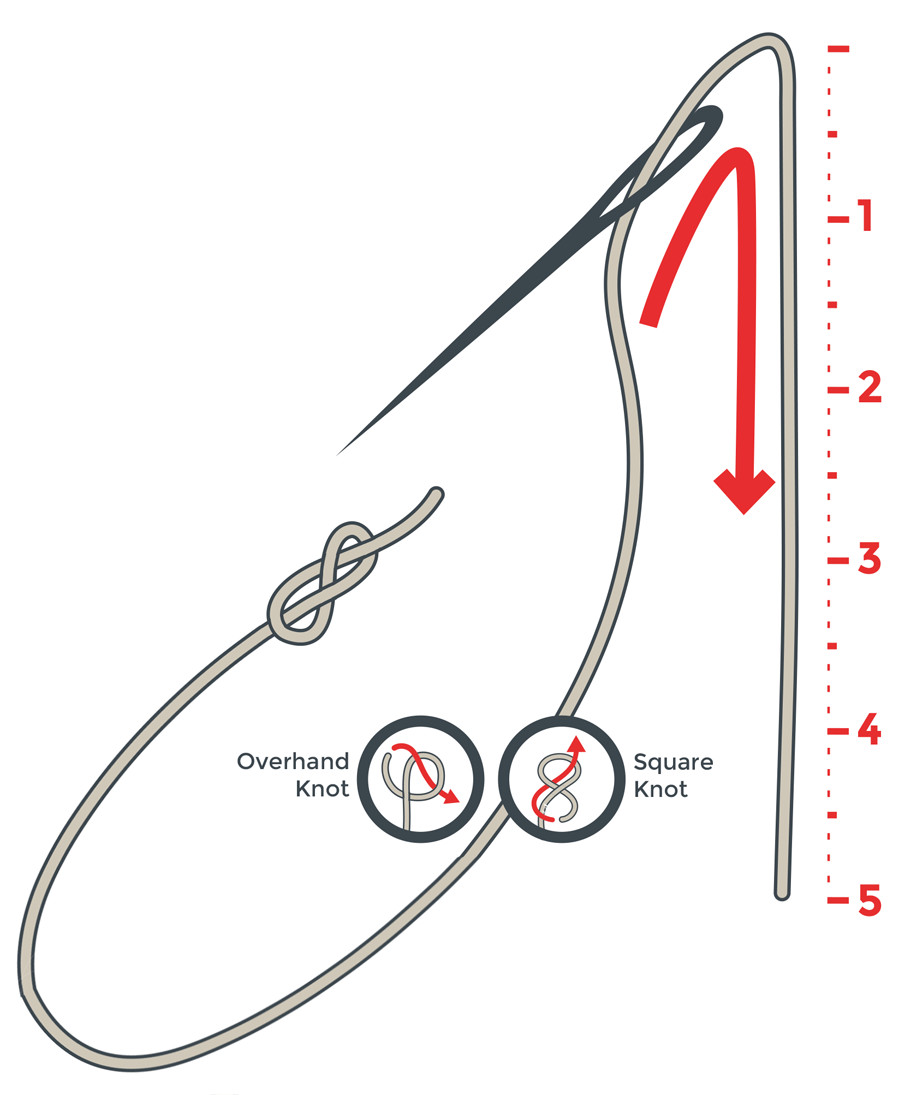
Before you begin sewing your project, you will need to tie a knot at the long end of the thread to prevent you from completely pulling it through the fabric. You can tie a simple overhand or square knot. The next sections will explain a few other knot methods.
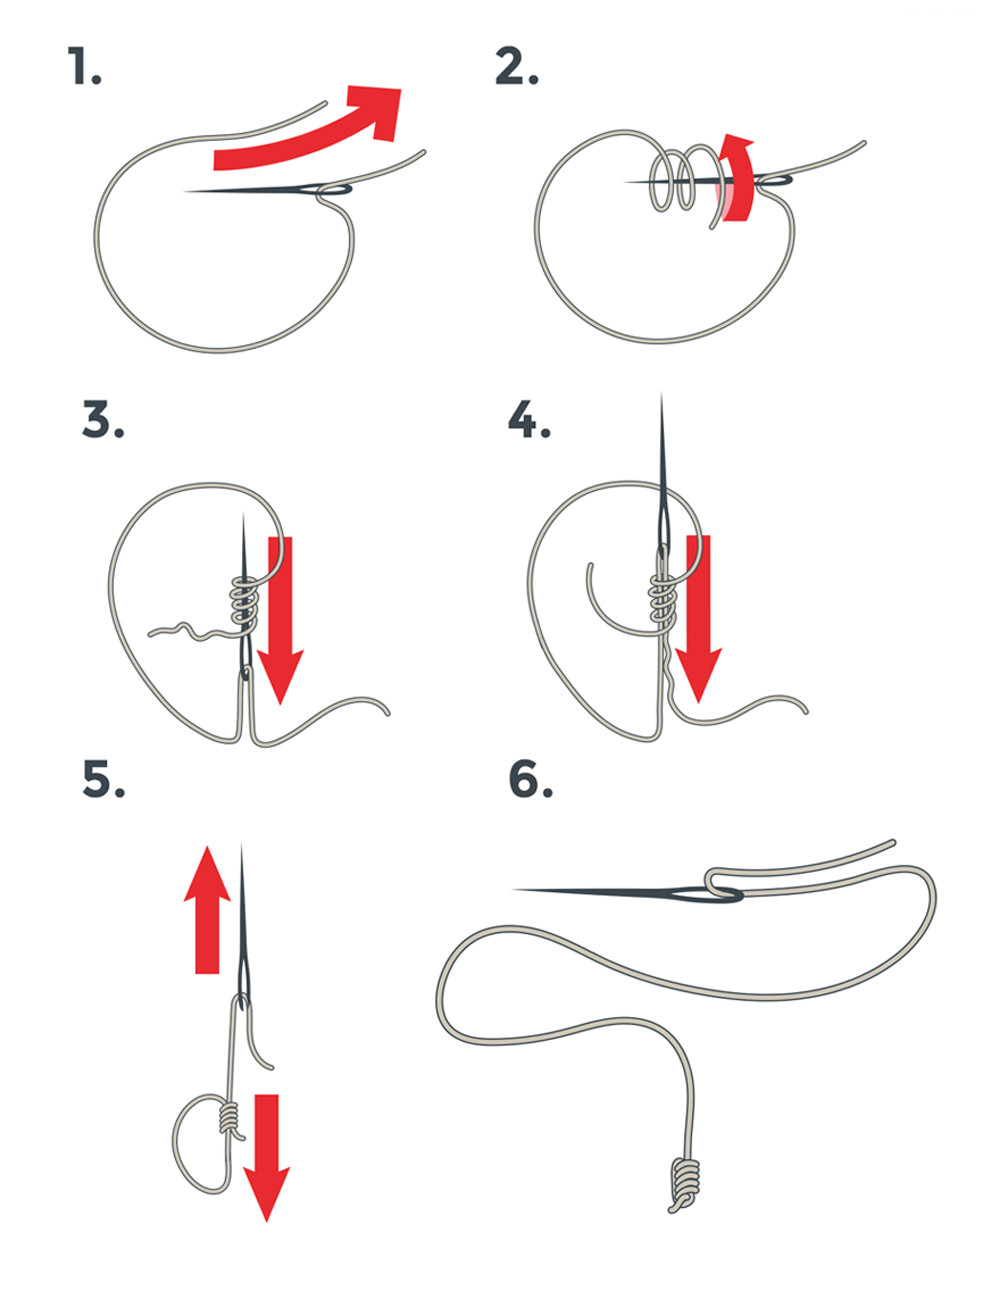
Starter Knot
A starter knot is a method of starting your stitch with a knot directly on your fabric.
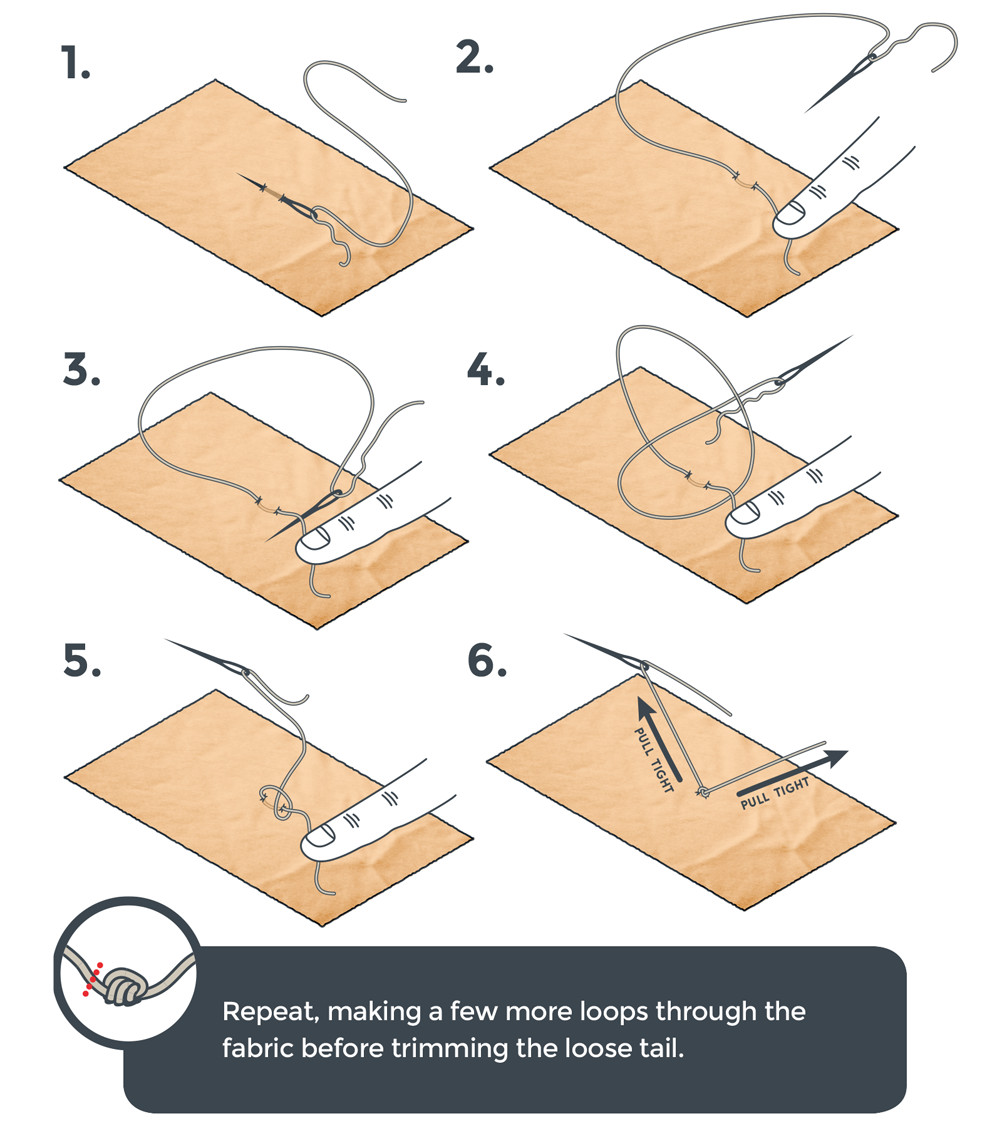
Quilter’s Knot
The slightly more advanced quilter’s knot is a way to tie a quick, secure knot on the thread. After some practice, this knot can be tied very quickly.
 |
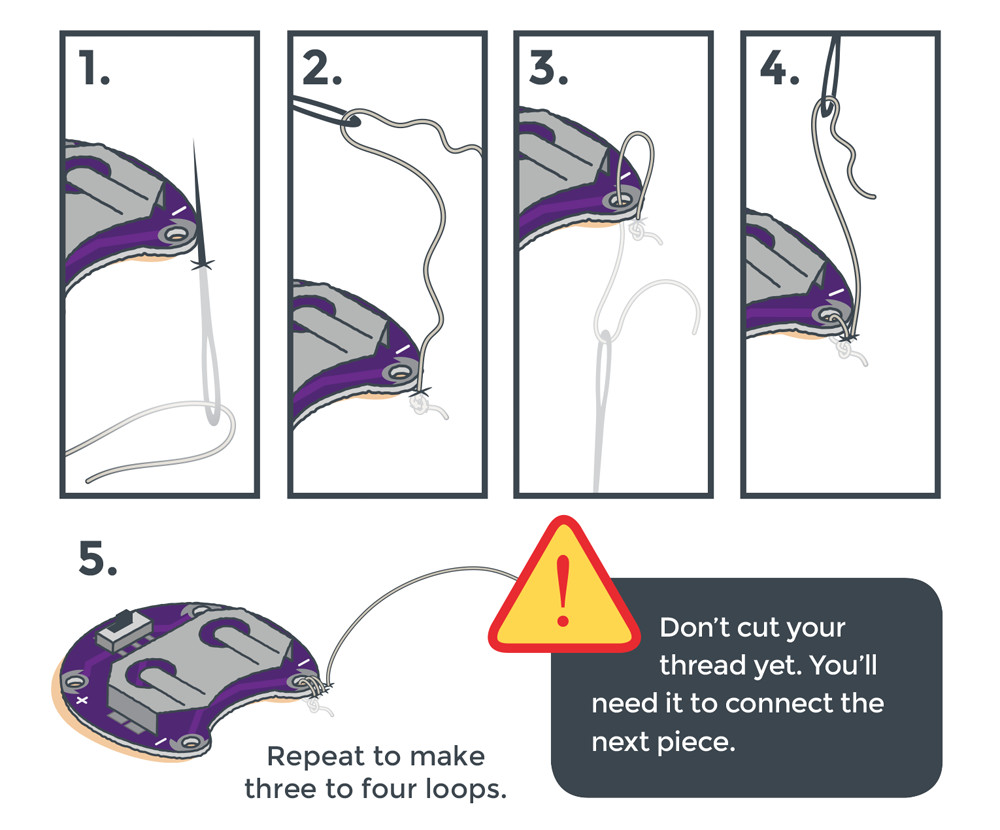
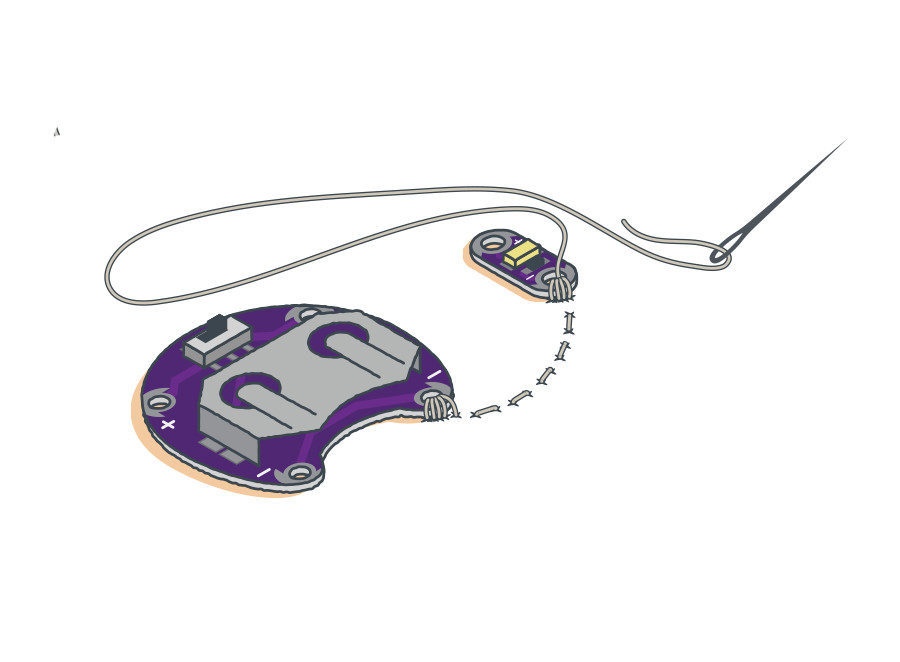
Connecting To LilyPad Sew Tabs |
We’ll stitch conductive thread around LilyPad sew tabs in our circuits to connect the pieces together. It’s important that you make three to four loops each time you connect your thread around an empty sew tab and pull the thread snug with each pass. This ensures you have made a strong electrical and physical connection between the thread and the sew tab. Pull loops tight before continuing your stitch.
 |
Sewing Basics |
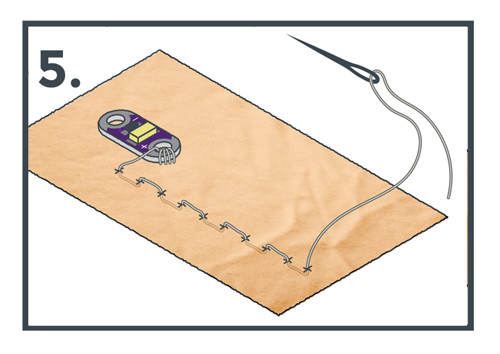
After sewing loops around a sew tab, a running stitch will enable you to connect LilyPad pieces together with a continuous length of conductive thread. Follow these steps:
Push the needle through the fabric about ¼" in the direction of your stitch path.
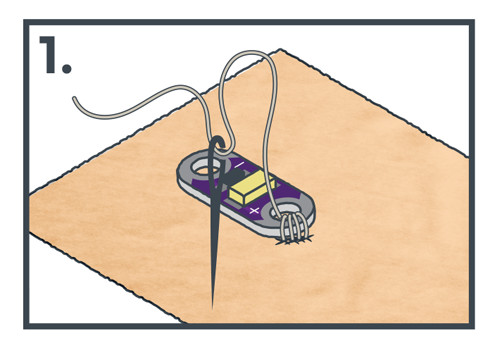
Pull the slack of the thread through so it sits flush with the fabric.
Push the needle back up through the fabric another ¼" along the stitch path.
Pull the slack of the thread through so it sits flush with the fabric.
Repeat this process to travel along the path to the next LilyPad piece you want to connect to, keeping stitches evenly spaced.
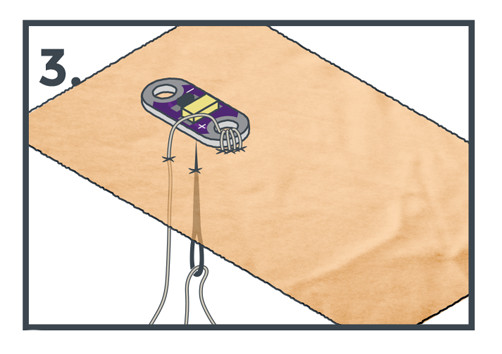
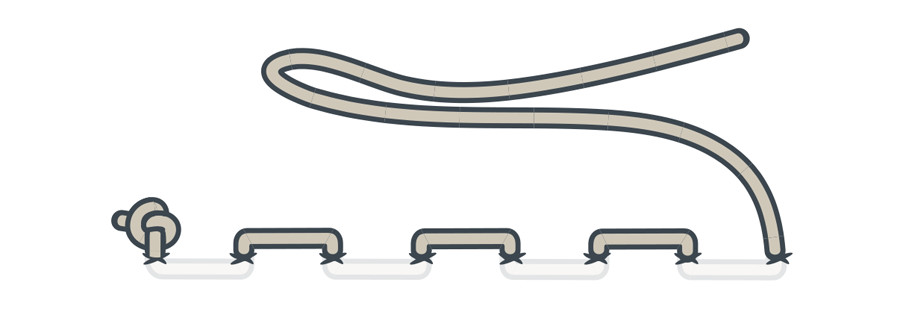
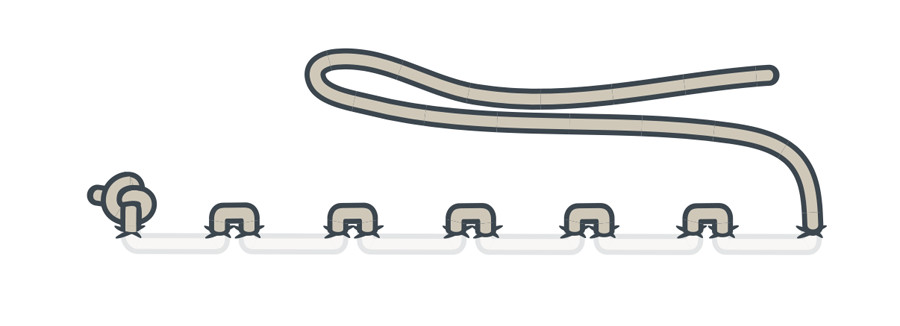
Running vs. Hidden Stitch
In a basic running stitch, the stitching will be even on both sides of the fabric.
To hide the stitches so that they are not seen on the outside of the project, make a longer stitch on the back of the project and a very small stitch on the front of the project. This method is called a “hidden stitch.”
|
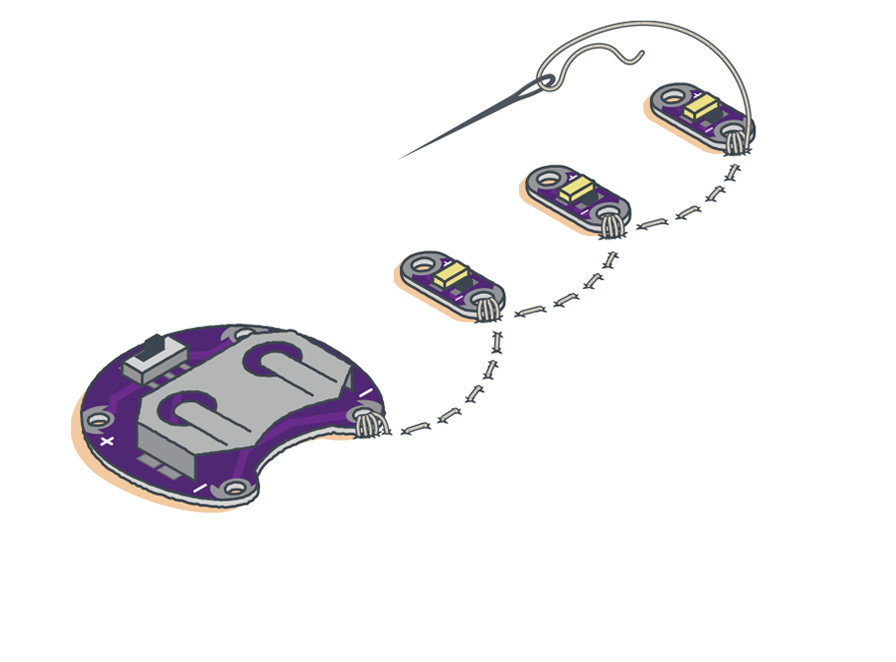
Connecting LilyPad Pieces |
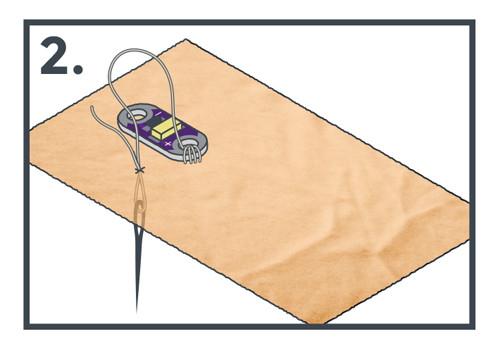
Both running and hidden stitches will enable you to connect LilyPad components together with a single length of conductive thread. To connect two LilyPad pieces, continue stitching after completing three to four loops around the sew tab.
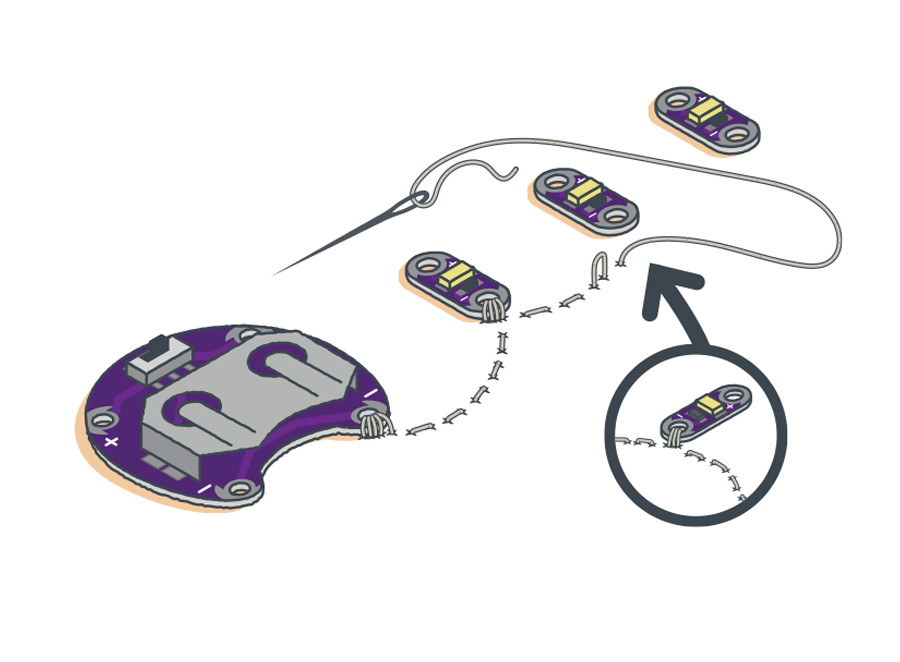
Connecting Multiple LilyPad Pieces
To connect more than two LilyPad pieces, instead of trimming your thread and starting over, continue stitching to the next piece, make three to four loops, and repeat as necessary. There is no need to use a new length of thread if the pieces will share a connection.
 |
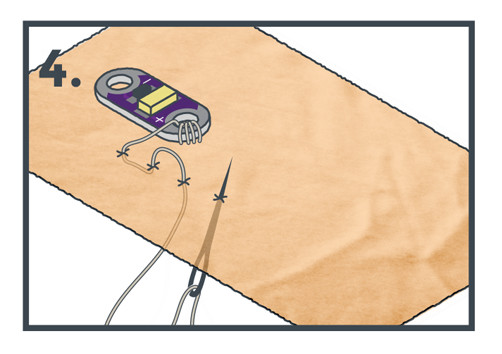
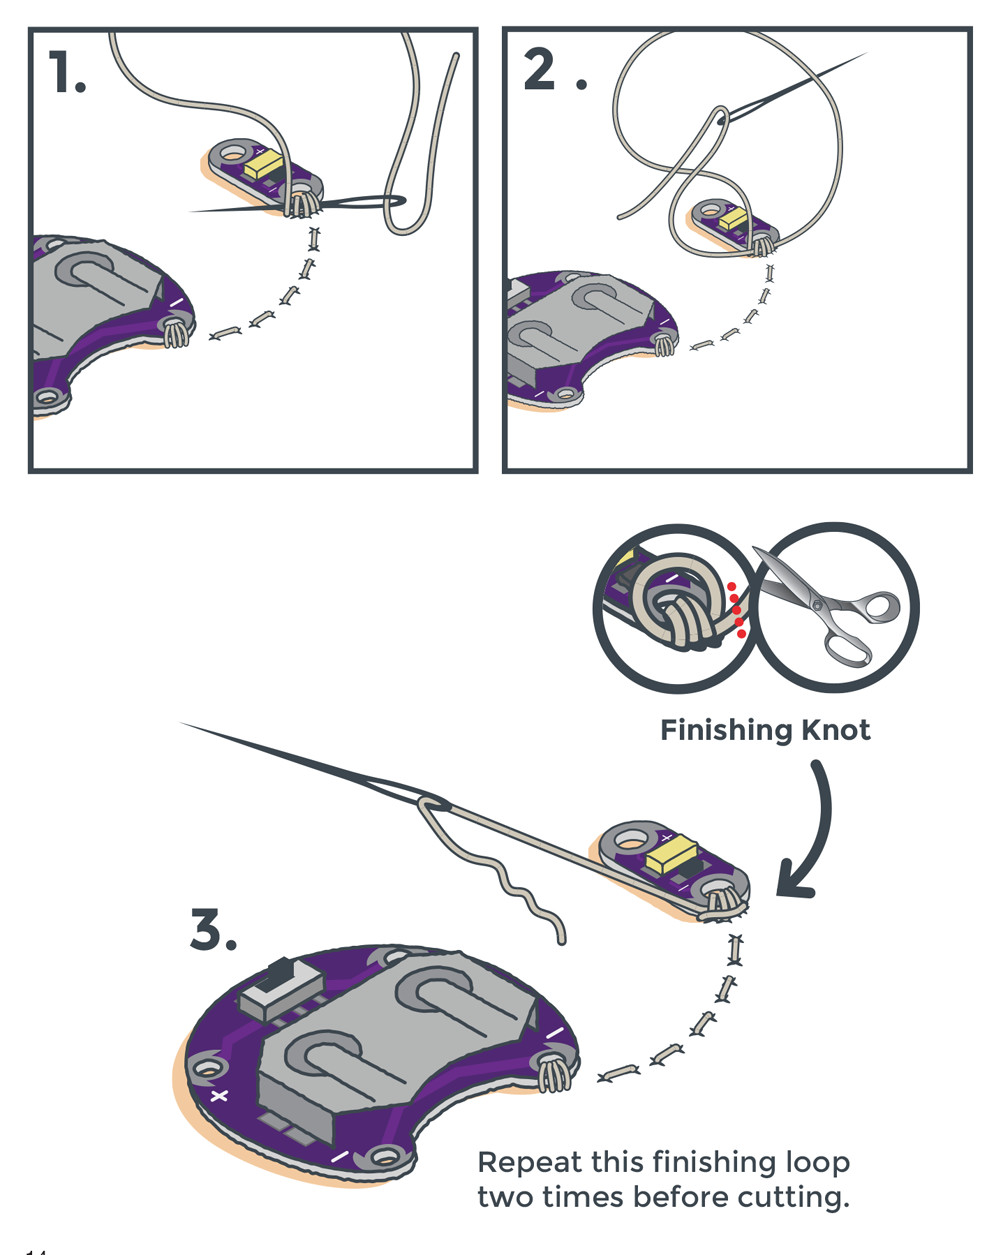
Finishing Your Connection |
When you have completed connecting components, use a finishing knot. Thread tails can cause electrical shorts, so be sure to trim your thread afterward.
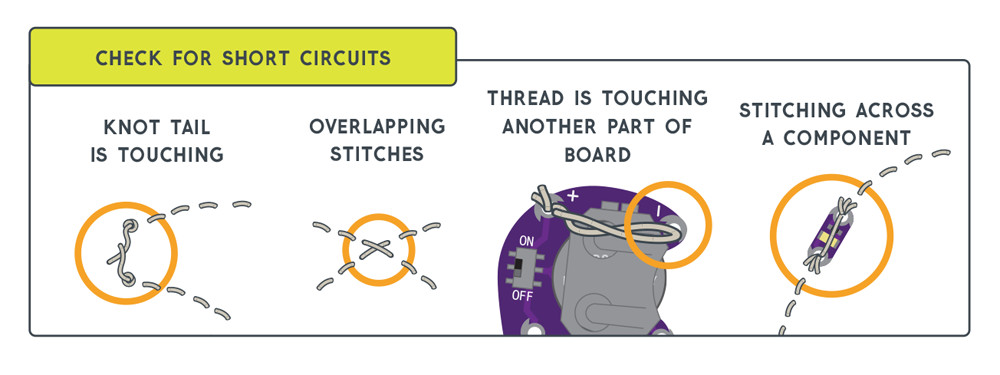
Checking for Conductive Thread Short Circuits
Watch out for any loose threads or knot tails in your project. If any piece of the conductive thread from the positive (+) side of your circuit accidentally touches the negative (–) side, it can cause a short circuit. A short circuit connects the battery to itself and bypasses the rest of your project causing an unwanted amount of current draw from the battery. Stitching directly over stitches in another part of the circuit can also cause a short.
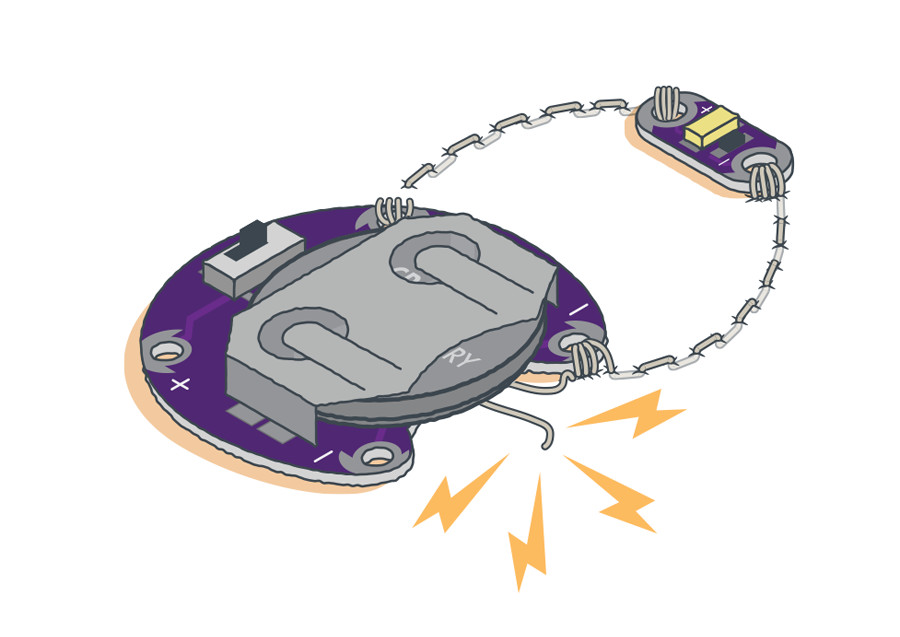
It’s important that your stitches do not cross over each other or touch other parts of the circuit. The batteries used in these projects shouldn’t burn or shock you if they short circuit (although they may heat up), but higher voltage projects or power sources could be dangerous.
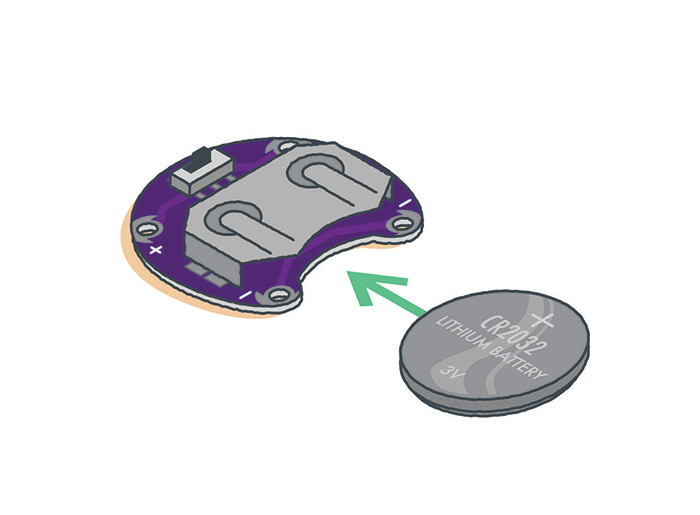
Installing Your Battery and Testing Your Finished Circuit
Once all your pieces are connected with conductive thread, your finished circuit needs a power source. Install your coin cell battery, positive (+) side up, into the battery holder. The image below shows how to place a battery in a LilyPad Coin Cell Battery Holder.
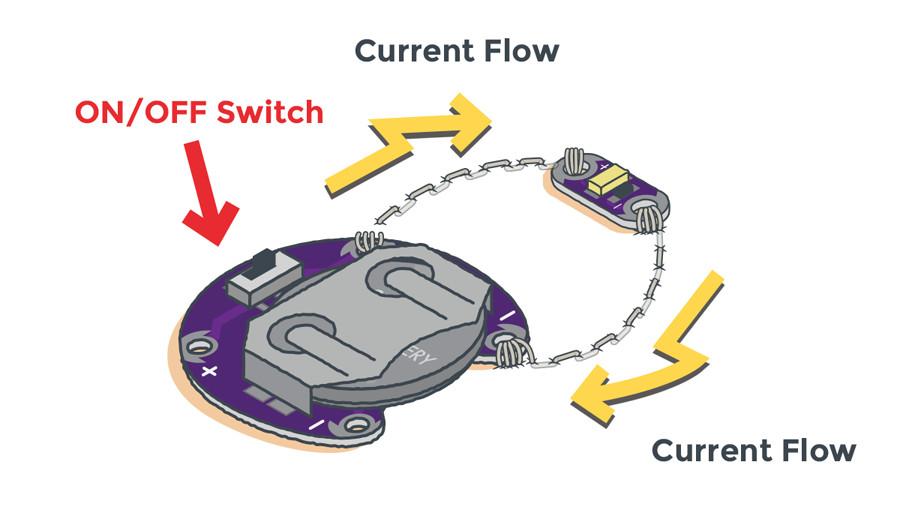
After completing the conductive thread connections, switch your circuit on, and see what it can do! If the circuit fails to work, you may have a short, a loose connection, a reversed component, or even something as simple as a dead battery.
When you turn on the battery holder switch, current flows through the conductive thread to the other parts of your circuit.
Or continue on to Glowing Pin of the LilyPad Sewable Electronics Kit to build your own circuit.
Troubleshooting
As you work on e-sewing projects, you may encounter problems such as loose connections that keep LEDs from lighting or cause your circuit to malfunction. Most LilyPad tutorials have a troubleshooting section to help you identify and solve problems with your circuit.
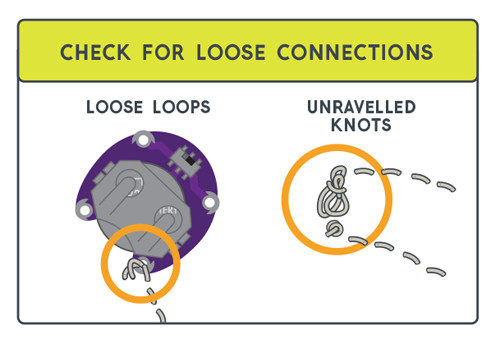
Circuit only working sometimes? Check for loose connections.
If the conductive thread is not making a tight connection to the LilyPad piece’s sew tabs, current will not be able to flow through consistently. If the project moves, the conductive thread may pull away from the sew tab and disconnect the circuit. To fix, pull stitching tight with tweezers or a needle if possible. You may also sew over the top of existing thread to create more tension and hold the thread securely to a sew tab.
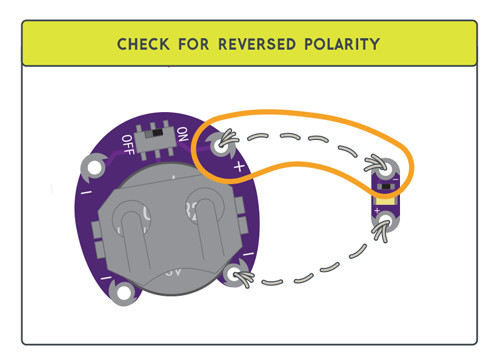
Circuit not working? Double check your polarity.
Some LilyPad components are polarized, meaning electric current can only flow through them in one direction. If sewn into the circuit incorrectly, they will not function. Double check the labeled sew tabs before you stitch to make sure they are oriented correctly.
Other issues to check for:
- Make sure the switch on your battery holder is in the ON position.
- Check to see if your battery is dead. You can do so with a multimeter. Try installing a spare battery.
- If following a project template, double check that the components are connected together in the right configuration
If you are still having trouble, you can use a multimeter to check for continuity or issues with your circuit. Our How To Use a Multimeter tutorial will help you get started.
Click here to view a pdf of Troubleshooting pages from the LilyPad Sewable Electronics Kit.
Caring For Your Project
Unlike copper wire, which has a coating, conductive thread is uninsulated. This means the thread behaves like bare wire and can accidentally short circuit if stray strands come in contact with each other.
To avoid any accidental short circuits after the project is stitched and tested, we recommend covering the thread with a thin layer of fabric glue, fabric paint, or an additional layer of fabric. This is especially important for projects that are wearable or three-dimensional. Never work on a metal surface when using conductive thread. For more detailed insulation instructions, take a look at this tutorial:
Insulation Techniques for e-Textiles
JANUARY 22, 2015
Cleaning Your Project
If your project gets dirty, remove the battery and carefully hand wash with mild detergent. Let your project air dry; a dryer can damage the LilyPad pieces or stitching.