LilyPad Reed Switch Hookup Guide
Introducing the LilyPad Reed Switch
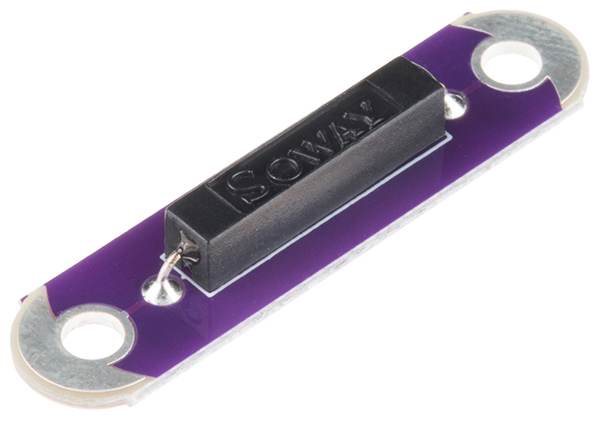
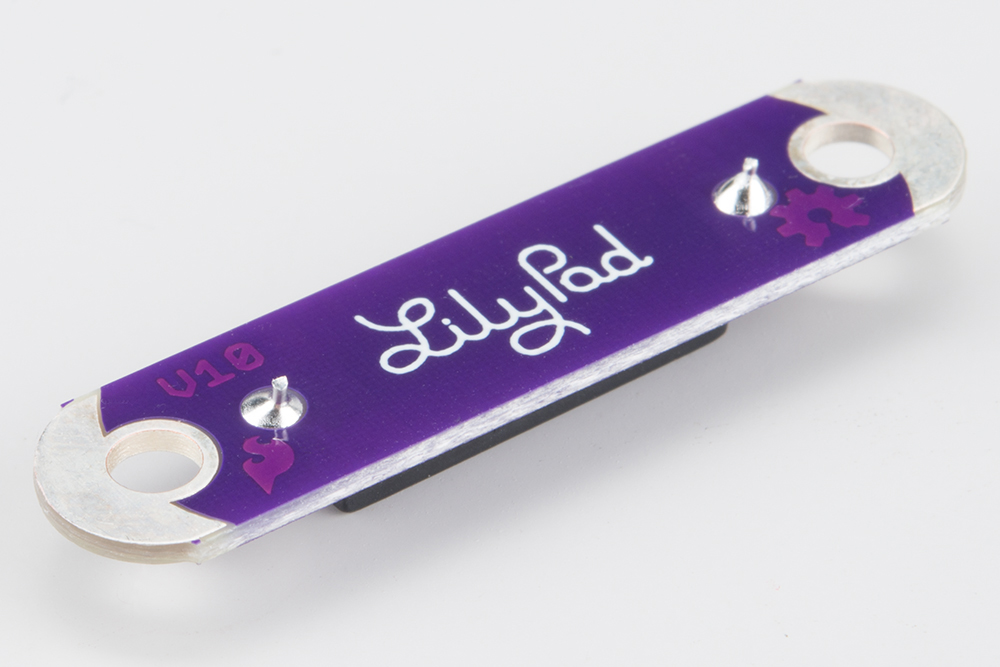
The LilyPad Reed Switch is a simple breakout for a reed switch that will make it easy to use in e-textiles circuits in exactly the same manner that you can currently use the LilyPad Button and Switch. In order to make it more durable for wearable use, we’ve used a different style of reed switch, which is insulated. This means that the same glass switch is encased in black plastic, making it much more difficult to break, but it works in exactly the same manner.
Materials
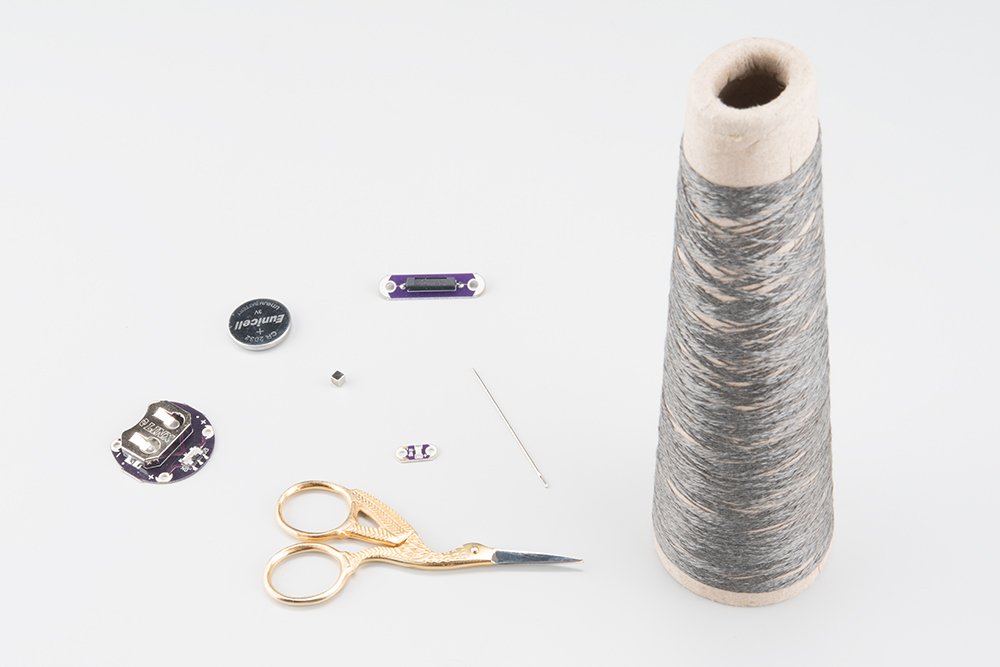
To follow along with this tutorial, we recommend the following materials:
You’ll also need a pair of scissors and some fabric to sew your circuit onto.
Suggested Reading
Here are a few other examples of switches in action:
What is a Reed Switch?
Before we learn how to use the LilyPad Reed Switch, let’s learn how reed switches work.
A reed switch is a simple mechanical switch that is activated via a magnet. Two thin pieces of metal inside are nearly, but not quite, touching. When the device is exposed to a magnetic field, the two ferrous materials inside the switch pull together, and the switch closes.
You can learn more about momentary switches over at our Switch Basics tutorial.
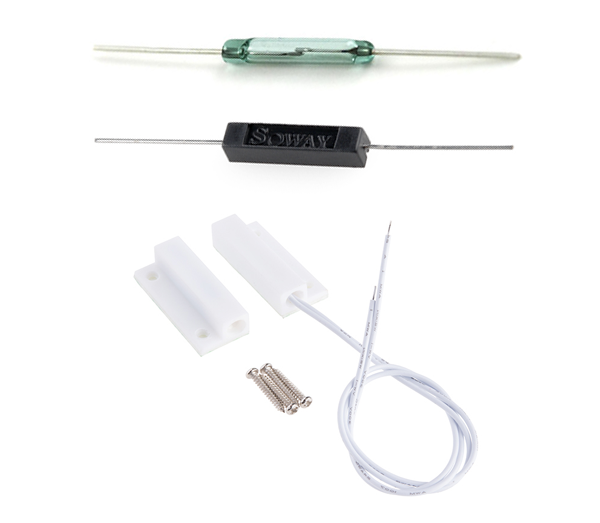
From top to bottom: A glass PTH reed switch, an insulated plastic PTH reed switch, and a reed switch designed for doors and windows. If you look closely at the center of the top, glass switch, you can see the metal arms inside.
Designing a Reed Switch Circuit
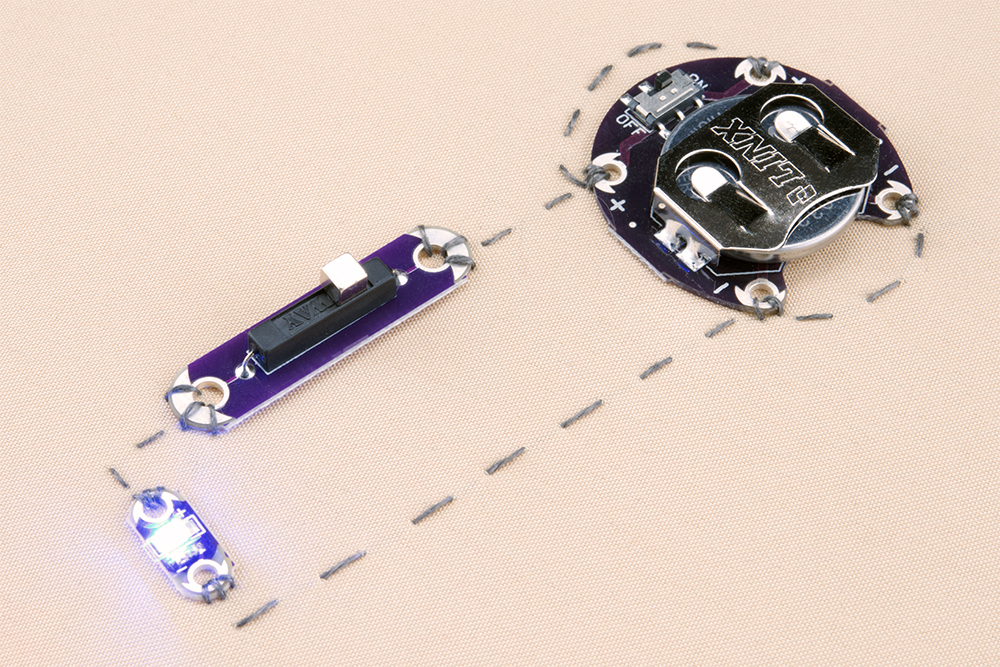
Heads up! We try to keep the backs of LilyPad boards smooth and free of components and solder joints to protect the fabric of your projects, but, in this case, it wasn't possible. As a result, there are two cut pins poking out of the back of the board, as seen below.
If the board is going to sit directly on top of a delicate fabric, we recommend covering these pins with something that will blunt the pins and not damage the cloth. Hot glue, puff paint, and sugru are all potential solutions. Feel free to leave yours in the comments!
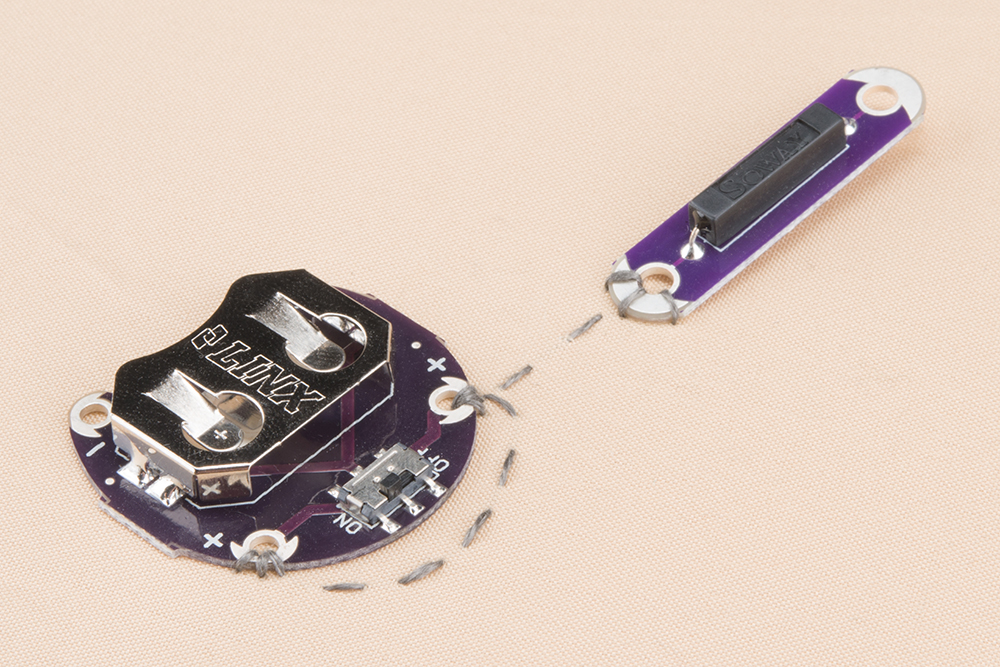
Once you’ve covered the pins, go ahead and line up your components, pointing the positive and negative pins of the battery pack towards the positive and negative pins of the LED, and placing the reed switch lengthwise between them, separating the positives.

Sew down both positive sewtaps on the battery holder, going around the outside with your stitches. Don’t wrap your thread over the top of the board! From there, stitch up to the first side of the reed switch (either one is fine, this is a non-polarized component!), and sew that down as well. Knot and cut your thread.
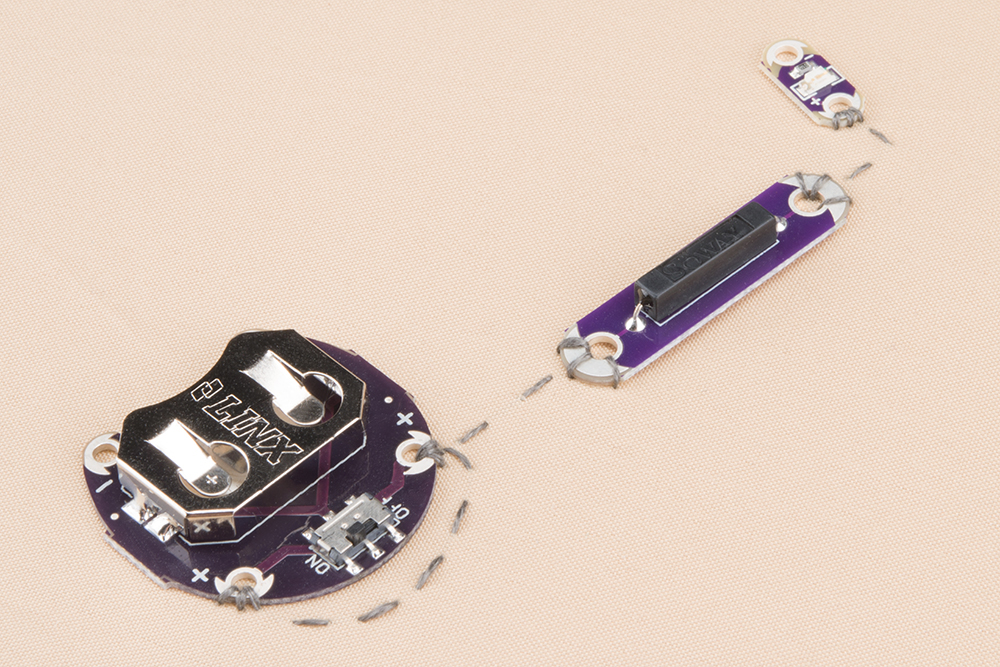
With new thread, sew down the second half of the switch and connect it to the positive sew tap of the LED, then knot and cut again.
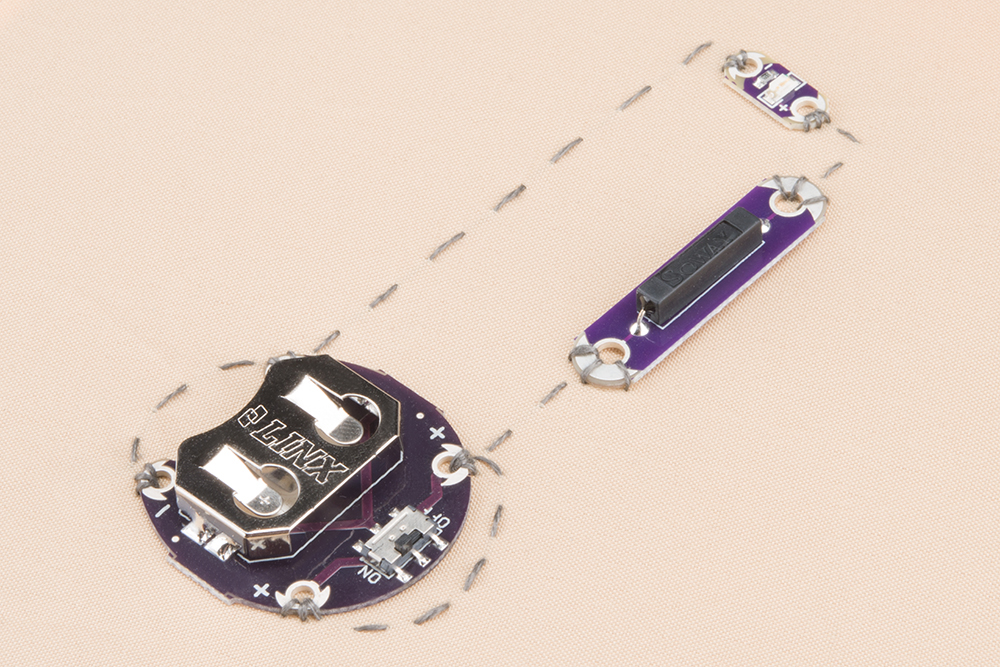
With new thread once again, sew down the negative pin of the LED, stitch down to the negative side of the battery pack, and sew down both negative sew taps, again stitching around the board to connect them rather than in a straight line across the board. This prevents the battery from sitting on top of the connecting thread, which could cause a short circuit.
Slide the battery into the battery holder, make sure that the slide switch it turned to “on”, and approach the reed switch with a magnet. The light should turn on when it is near (it doesn’t need to be touching if it’s a strong magnet), and off when it’s far.