Paper Circuit Pin
Introduction
This quick craft project shows you how to create a circuit using copper tape instead of wire to light up an LED and make a wearable piece of e-craft art. Build the circuit on a cardstock template, attach a design printed on vellum to diffuse the LED’s light and use a binder clip to turn the circuit on and off.
Download printable templates for the base card design and different overlay designs or design your own circuit using these instructions as a guideline.

Materials and Tools
Here is a list of all the materials and tools you’d need to follow along:
Notes:
- You will use ~9" of tape per card.
- Choose your favorite LED color - here are some of our 5mm LEDs.
Additional Materials:
- Cardstock (to print templates or design your own)
- ½" square of vellum, wax paper, rice or parchment paper- creates a nice diffused effect for the LED to shine through the robot’s heart
- Clear Tape
- Scissors
- 9/16" Metal Binder Clip - from your local office supply store or online. The black plastic ones will not work with this project, they need to be all metal.
- Adhesive Pin Back - from your local craft store or online
- Decorating Supplies - stickers, markers, or paints to embellish your designs
Step 1: Print Template
Paper Pin Template - 10 per pages, double sided
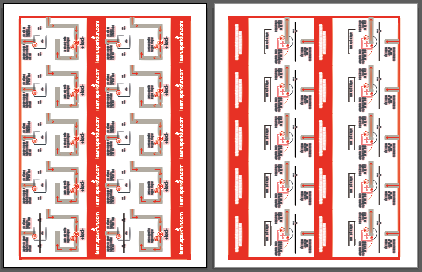
Print the base templates (double-sided) on cardstock, and cut them out. Depending on your printer’s margin settings, it may take some adjustments to make sure the front and back align. If possible, set your margins to 0 in both your program and print settings.
Robot Design - 18 per page
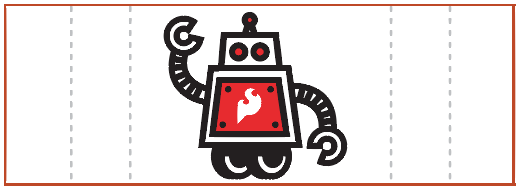
Print your pop up graphics on vellum or thin paper, and cut them out. Fold along the dotted lines.
Step 2: Create Copper Traces
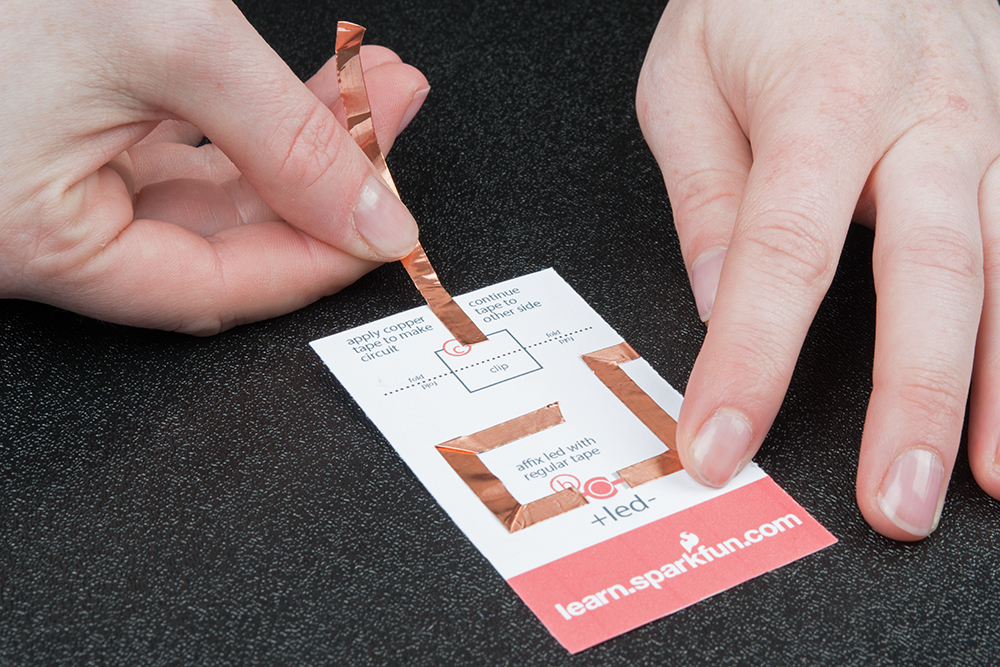
Time to create a path for our electricity with copper tape. The template has icons to help guide you in constructing the circuit.
Line A
Take a look at the template and find the circle marked A. Peel away a few inches of the paper backing from the copper tape, and stick it down along the grey line.
This line continues around the edge of the template to the front of the card.
On the front of the card, we’ll need to turn a corner with the tape. To keep a solid connection of copper around corners, we’ll be using a folding technique to press the tape into shape.
Start by sticking the copper tape down until you reach the corner, then fold the tape backward on itself. Use a fingernail or pen to give it a good crease at the edge.
Then, carefully move the tape down around the corner – you should see the fold forming – and press down flat against the paper. Continue along the line, folding around one more corner.
Continue the tape until the end of the gray line.

Cut when you reach the scissors icon.
Line B
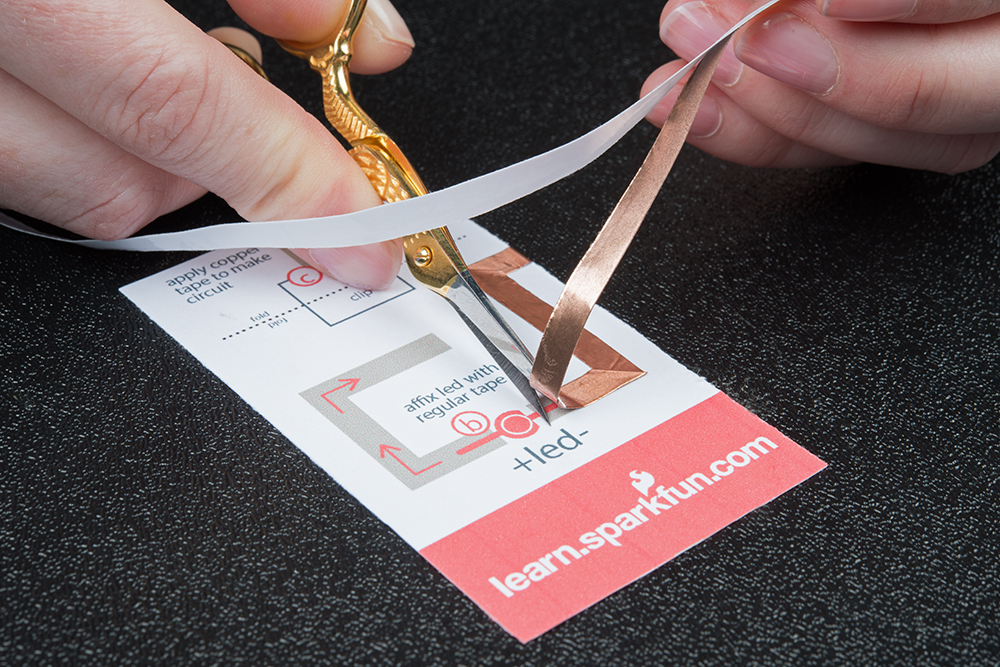
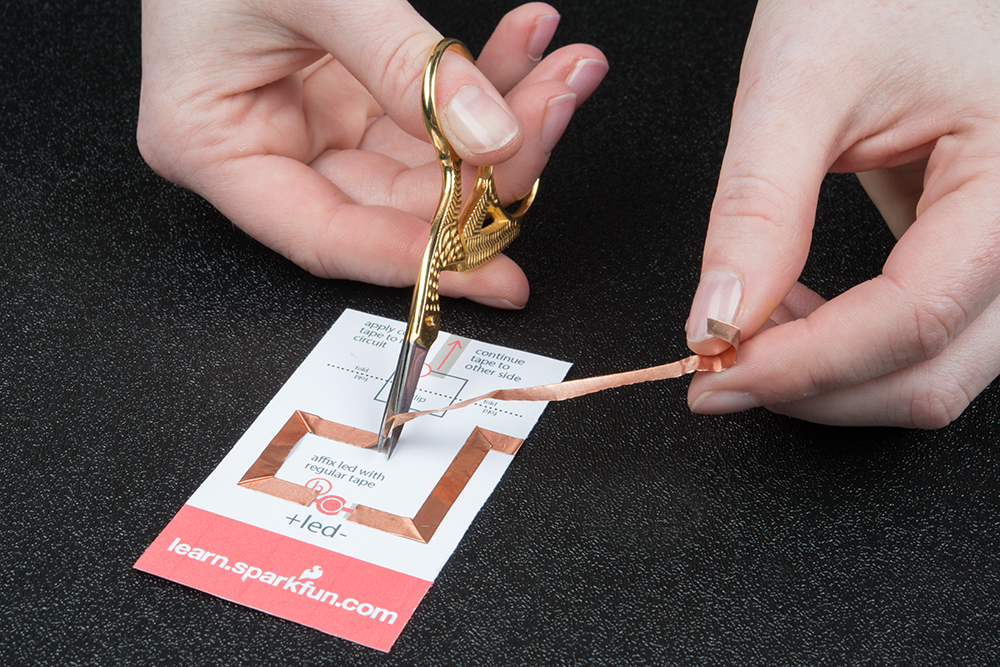
Line B is similar to Line A – we’ll fold around two corners. Begin at the gray line marked B, making sure to leave an opening after Line A. The LED will bridge the gap between these pieces of copper tape later.

Cut at the end of the line.
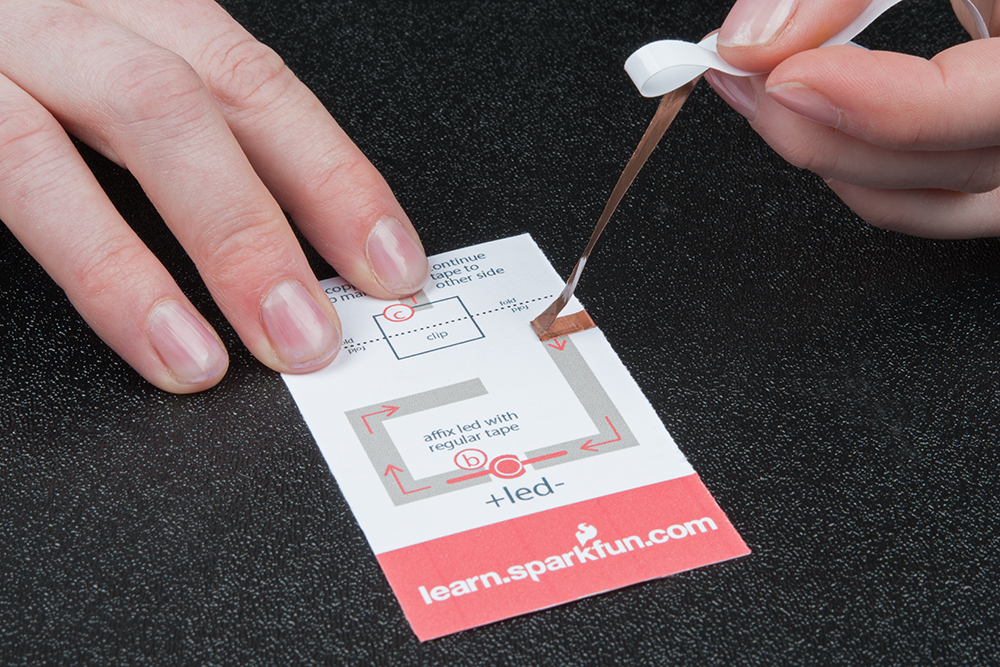
Line C
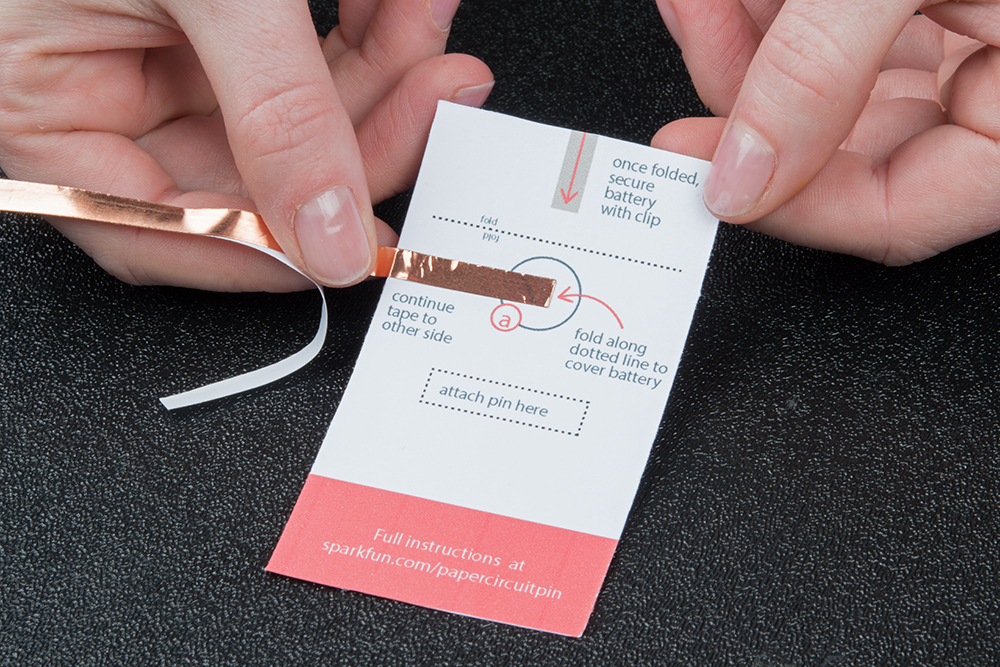
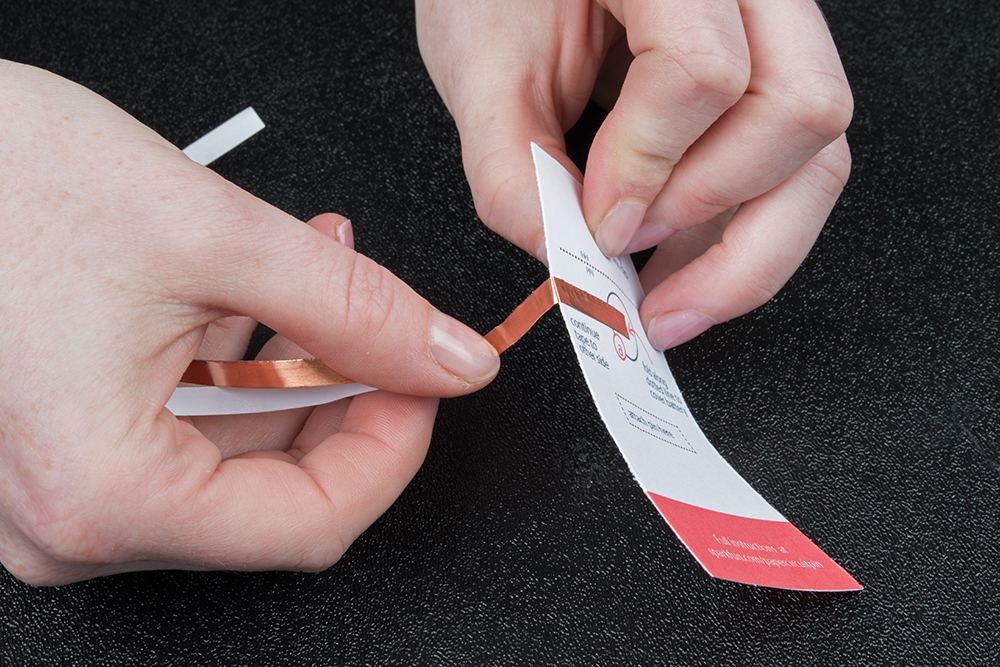
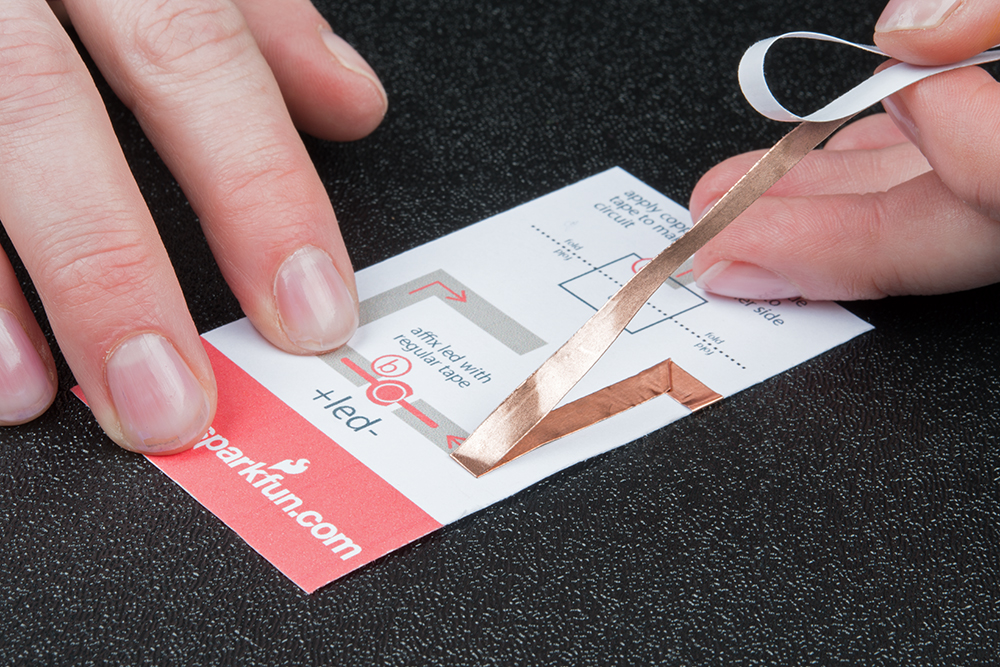
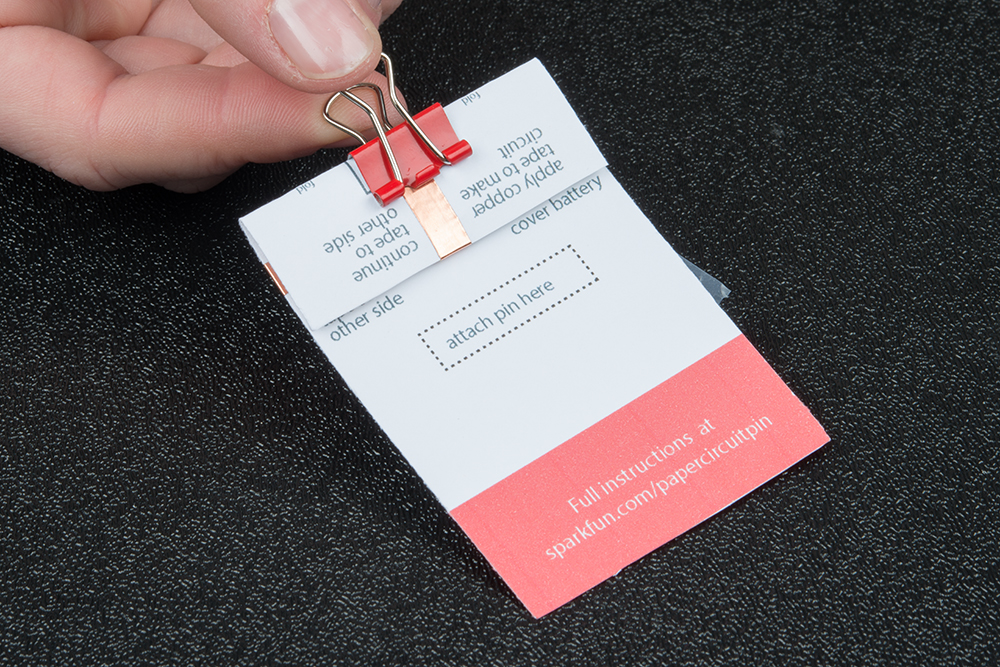
The last copper tape line will also form a battery holder. This line travels over the edge of the template to the back, so don’t cut until the end of the line.
Once the copper reaches the edge, flip the template over and continue the line.
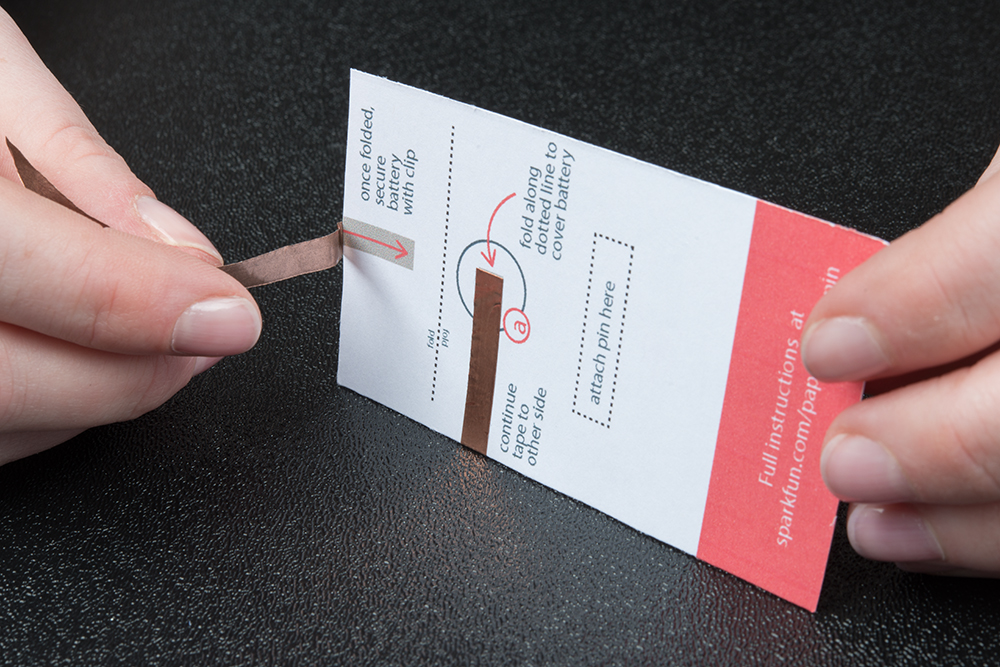
This line allows the top of the copper to fold down over the coin cell battery – the positive side of the battery is the top and negative side is the bottom – creating a ‘battery sandwich’ with copper tape touching each side.
Fold along the dotted line toward the back of the template to create the flap.
Do not put the battery in yet.
Step 3: Prepare and Place LED
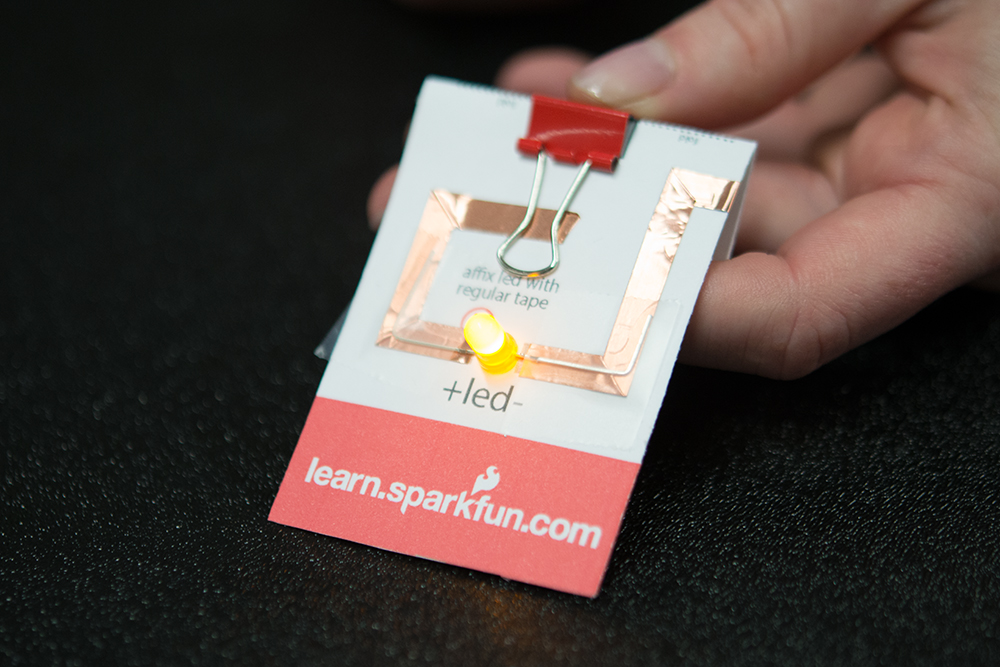
Now that our copper tape is in place, it’s time to add the LED. The template has an LED symbol on the front. We’ll be bending the LED to fit over the red circle icon.
LEDs are polarized, which means they can only be installed one way. There is a positive and negative side to each LED – the longer leg is positive and shorter is negative. There is also a flat side on the bulb itself; this is the negative side.
Read more about LED polarity in our Light-emitting Diodes (LEDs) Tutorial .
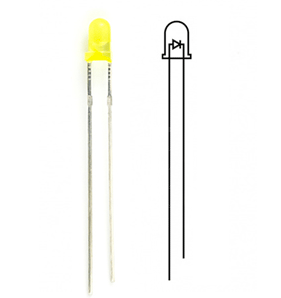
Bend the positive leg of the LED flat, and make a small right angle bend so that it touches the copper tape marked with a + sign. Do the same to the negative side, and place the LED on the space between the tape as shown.

Use clear tape over the wires to hold down to the copper.

Step 4: Installing Battery and Switch
Once the LED is installed, it’s time to test our circuit by adding a battery. Carefully slip the battery underneath the folded flap we made earlier, and center it inside the circle icon. Make sure the positive side of the battery (top, marked with the battery model and +) is facing up.
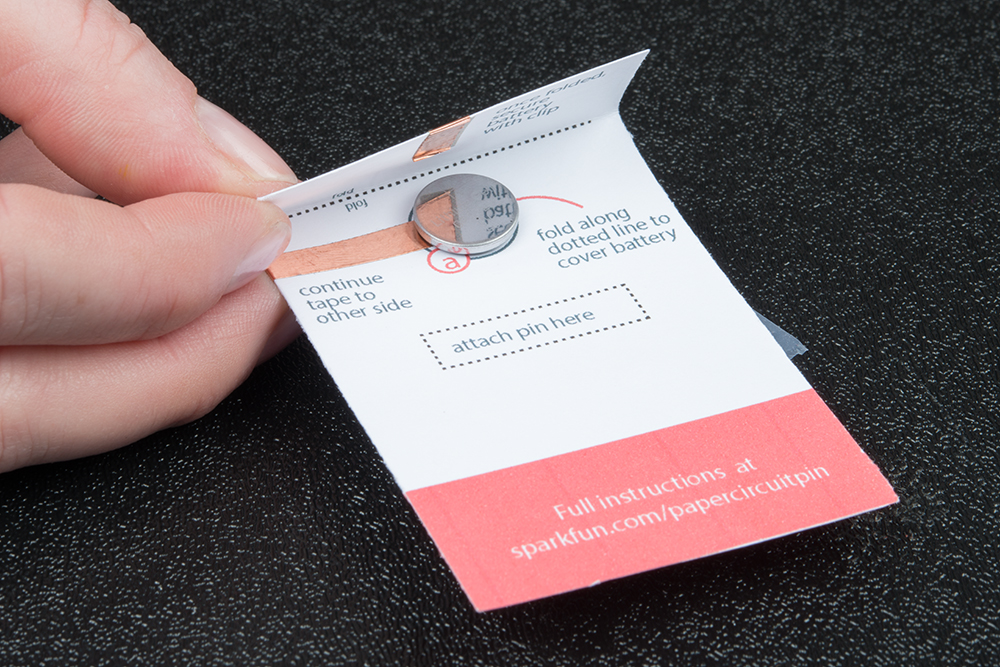
Press the flap over the battery, then use the binder clip to hold everything together.
Flip the project over, and use the handle of the binder clip as a switch to connect the battery to the rest of the copper tape circuit. Flip it back up to turn off. The back handle can be flipped down and taped for extra stability.

Step 5: Decorate and Customize
Now that the project is lighting up, it’s time to customize!
If you downloaded a graphic, print on vellum or thin paper to create a lantern effect. Cut along the solid lines, and fold along the dotted lines. Secure with tape around the edges of the project.
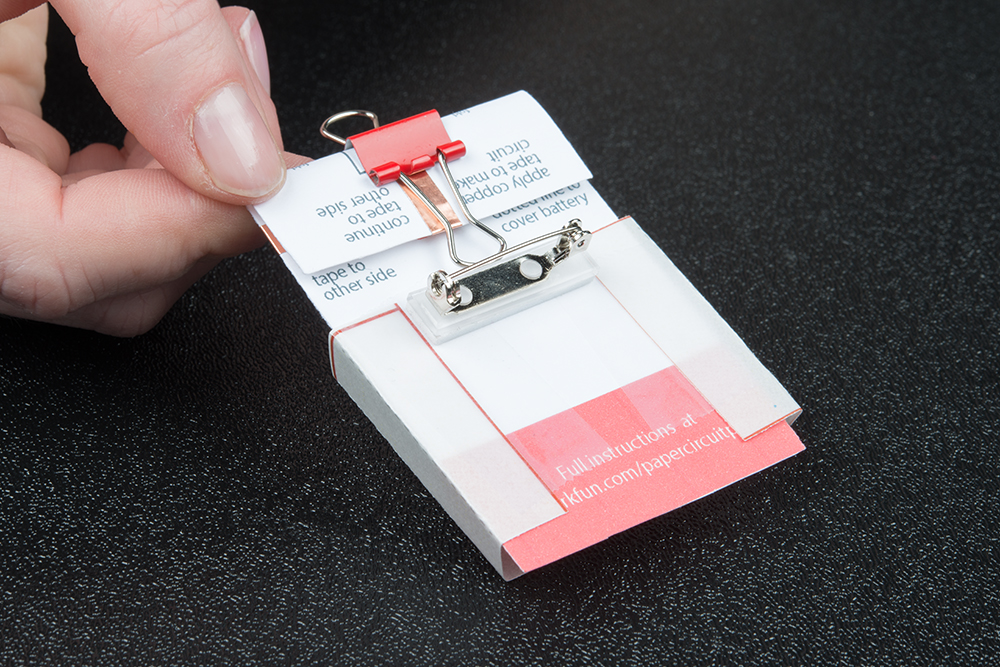
Add an adhesive pin back placed on the labeled rectangle to make the project wearable.