Powering LilyPad LED Projects
Introduction
One of the most commonly asked questions when getting started with e-textiles is “How many LEDs can I put in my project?” In this guide, we will cover conductive thread’s resistance and how that affects powering LEDs, calculations to predict battery and power requirements, and some construction tips.
If this is your first time working with e-textiles, we recommend starting with this tutorial:
Conductive Thread Resistance
One of the most important things to consider when building a wearable project is the resistance of conductive thread. Unlike copper wire, which has very little resistance, conductive thread’s resistance will vary depending on the metal used to make the thread and the thickness of the thread. Most conductive threads list resistance in Ohms/Ft. The lower this number is, the better, because less resistance means more electricity can get through to the components used in your project.
The basic electrical property Ohm’s Law states that running an electrical current through a material high in resistance causes the voltage to drop. The higher the current, the greater the voltage drop. This means that even though a LiPo battery powering your LilyPad may put out 3.7 volts, by the time it gets through the thread to your components, it may drop to 3.0 volts or less.
Many electrical components, such as LEDs, need a certain voltage to function properly. For example, in a project with LilyPad LEDs if the voltage drops below 3 volts, a blue LED will stop working, followed by the green and finally the red. To get full-color output from RGB LEDs like the LilyPad RGB LED Board, you should always try to run at 3 volts or above.
To figure out an LED's voltage needs, you can take a look at the forward voltage section of the LED's datasheet. Check out this tutorial for more detailed instructions on how to read an LED's datasheet.
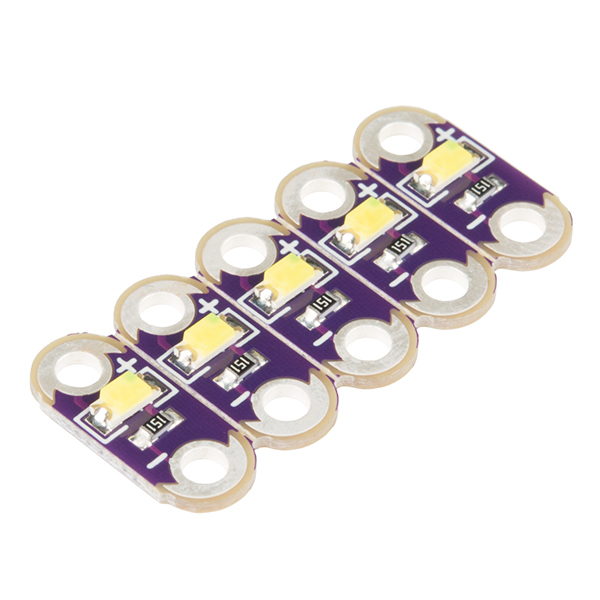
Forward voltages of LilyPad LEDs
| LilyPad LED | Forward Voltage |
|---|---|
| Blue | 3.2 Volts |
| Green | 3.2 Volts |
| Pink | 2.5 Volts |
| Purple (retired) | 2.8 Volts |
| Red | 2.0 Volts |
| White | 3.3 Volts |
| Yellow | 2.0 Volts |
Forward voltages of LilyPad RGB LEDs:
| LilyPad LED | Red LED Forward Voltage | Green LED Forward Voltage | Blue LED Forward Voltage |
|---|---|---|---|
| LilyPad Tri-Color LED | 2.0 Volts | 3.5 Volts | 3.5 Volts |
| LilyPad Pixel Board | 2.2 Volts | 3.4 Volts | 3.4 Volts |
To minimize voltage drop, we’ll need to decrease the resistance of the power connections. There are a few ways to do this:
-
Keep the length of the power connections as short as possible. Because the resistance increases with length, if you reduce the length, you’ll reduce the resistance.
-
Reduce the resistance of the thread itself. Thicker thread has a lower resistance than thinner thread, and using multiple strands at a time reduces the resistance even further.
Use a non conductive thread to stitch bundled thread (either placed together or braided) to your base fabric. Leave enough open spaces in the stitching so you are able to stitch conductive thread to the larger thread bundle when connecting components. This video from e-textile expert Lynne Bruning shows this technique at around the 4:10 mark:
Conductive Thread Alternatives:
For large projects that require thread to travel long distances, projects with a lot of power-hungry pieces such as a large amount of LilyPad Pixel Boards, or in spots where thread may break under stress, here are some alternatives that work well for wearables:
Conductive Ribbon
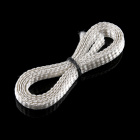
Specialty nylon ribbon with flexible stranded wire woven into it is a great alternative to conductive thread with low resistance. You will need to solder to the tinsel within the ribbon in order to use in a project.
Conductive Fabric Traces
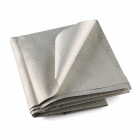
You can create your own low resistance traces using thin strips of conductive fabric. We recommend using iron-on adhesive to attach to fabric or ribbon, then using conductive thread to hand stitch components to the traces.
![]()
Don’t forget to insulate the fabric traces as you would conductive thread.
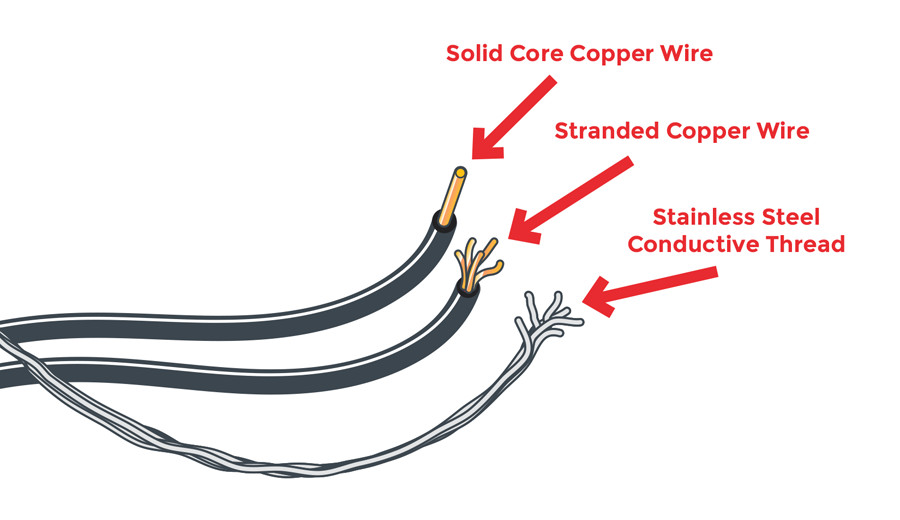
Stranded Wire
Another alternative is to switch from conductive thread to traditional wire. Wire has a much lower resistance than thread, allowing you to use more LEDs than a conductive thread circuit. You’ll have to switch from sewing to soldering, but it’s easy to solder wires to the same sew tabs to which you would normally connect thread.
Wire is prone to breaking if it is flexed repeatedly. For wearable projects that require maximum flexibility, use stranded wire (not solid), and look for special silicone-jacketed wire that is extremely flexible. For projects that will be washed, water may wick into exposed stranded wire, becoming trapped and potentially corroding it over time. Apply a small dab of silicone sealant to the cut ends of the wire to prevent this from happening.
If you have never soldered before or worked with wire, we recommend visiting the following tutorials.
How Long Will My Project Run on Battery Power?
To figure out how long your project will run on battery power, you need to know two things: how much current your project uses and the capacity of your battery.
You can measure exactly how much current your project uses by measuring it with a multimeter, but we can also make a pretty accurate guess by looking at the LED datasheets and doing some math.
A typical LilyPad LED uses 20mA of current at full brightness. Multiply that by the number of LEDs you’re using, add 10mA for the LilyPad that’s running everything, and you’ll have an estimate of your average current draw.
A project with 10 LilyPad LEDs controlled by a LilyPad Arduino
20mA * 10 + 10mA = 210mA
A single LilyPad Pixel Board will use 40mA when it’s set to white (all three internal LEDs fully on). For a worst-case estimate, you could multiply that by the number of pixels in your project.
However, you’ll probably be displaying different colors on your LilyPad Pixel Boards and turning them off entirely at times. The resistance in the threads will also drop the voltage, meaning the LilyPixels will run slightly dimmer and use less current. Usually, it’s safe to halve the above estimate, which gives us 20mA.
Battery Capacity
Now, let’s look at the battery. Battery capacity is given in milliamp-hours (mAh). This number tells you how many milli-amps (mA) a full battery can provide for one hour before it’s empty. The e-Textiles Battery that comes with most LilyPad Arduino kits has a 110mAh capacity. For many projects, especially ones with a large number of LEDs, you will probably want to use a higher capacity battery for a longer run time.
Hours = Battery mAh / Project mA
Let's use the calculation above to see how long a 110mAh battery will power the project we used in the last example:
0.52 hrs = 110mAh / 210mA
Thus, an e-Textile battery will only power the project for approximately half an hour. Here’s an instance where a larger capacity battery would make sense, if the project needs to operate for a long time, such as during an event or showcase. The trade-off is that a higher capacity battery is also physically larger – make sure to plan accordingly for proper battery storage/attachment on your project to reduce strain on the wires and fabric.
Here are some typical runtimes for various SparkFun batteries and numbers of LilyPad LEDs/LilyPixels:
All example batteries will link to our webstore.
| Number of LEDs | 1 | 2 | 5 | 10 | 20 | ||
| Battery Name | Battery mAh | Hours of Operation | |||||
|---|---|---|---|---|---|---|---|
| Polymer Lithium Ion Battery - 40mAh | 40 | 1.3 | 0.8 | 0.4 | 0.2 | 0.1 | |
| E-Textiles Battery - 110mAh (2C Discharge) | 110 | 3.7 | 2.2 | 1.0 | 0.5 | 0.3 | |
| Coin Cell Battery - 20mm (CR2032) * | 250 | 8.3 | 5.0 | 2.3 | 1.2 | .61 | |
| Polymer Lithium Ion Battery - 400mAh | 400 | 13.3 | 8.0 | 3.6 | 1.9 | 1.0 | |
| Polymer Lithium Ion Battery - 850mAh | 850 | 28.3 | 17.0 | 7.7 | 4.0 | 2.1 | |
| Polymer Lithium Ion Battery - 1000mAh | 1000 | 33.3 | 20.0 | 9.1 | 4.8 | 2.4 | |
| Polymer Lithium Ion Battery - 2000mAh | 2000 | 66.7 | 40.0 | 18.2 | 9.5 | 4.9 | |
| Polymer Lithium Ion Battery - 6Ah | 6000 | 200.0 | 120.0 | 54.5 | 28.6 | 14.6 | |
* Note: the Coin Cell Battery is non-rechargeable.